Most Monday morning rituals include combing through your inbox from over the weekend and deleting emails from people and brands you don’t care about.
But every now and then there are emails you care about receiving…and you can’t seem to find them anywhere.
You wonder if you typed in your email incorrectly. Or if it didn’t send. You finally check your spam inbox and low-and-behold, there it is. Filtered out of your sight.
The only way to avoid this fate with important emails (ya know, like the kind from the tool that you run your entire business on) is to whitelist: to put someone on a “list” of sorts that allows them to bypass spam blockers and go straight to your inbox.
However, whitelisting procedures vary slightly between different email service providers, so this article will break down the steps for each service.
GMAIL:
It would be nice if you could simply check a box to add a sender to a list of friends, but unfortunately, Gmail doesn’t work that way. However, although it may take a couple extra steps, there are some easy and effective ways to whitelist your friends and important brands in Gmail.
ADD EMAIL ADDRESSES TO YOUR CONTACTS
This method will require you to go to your Google contacts link. To get there, click the nine dots in the upper-right hand corner and then click contacts.
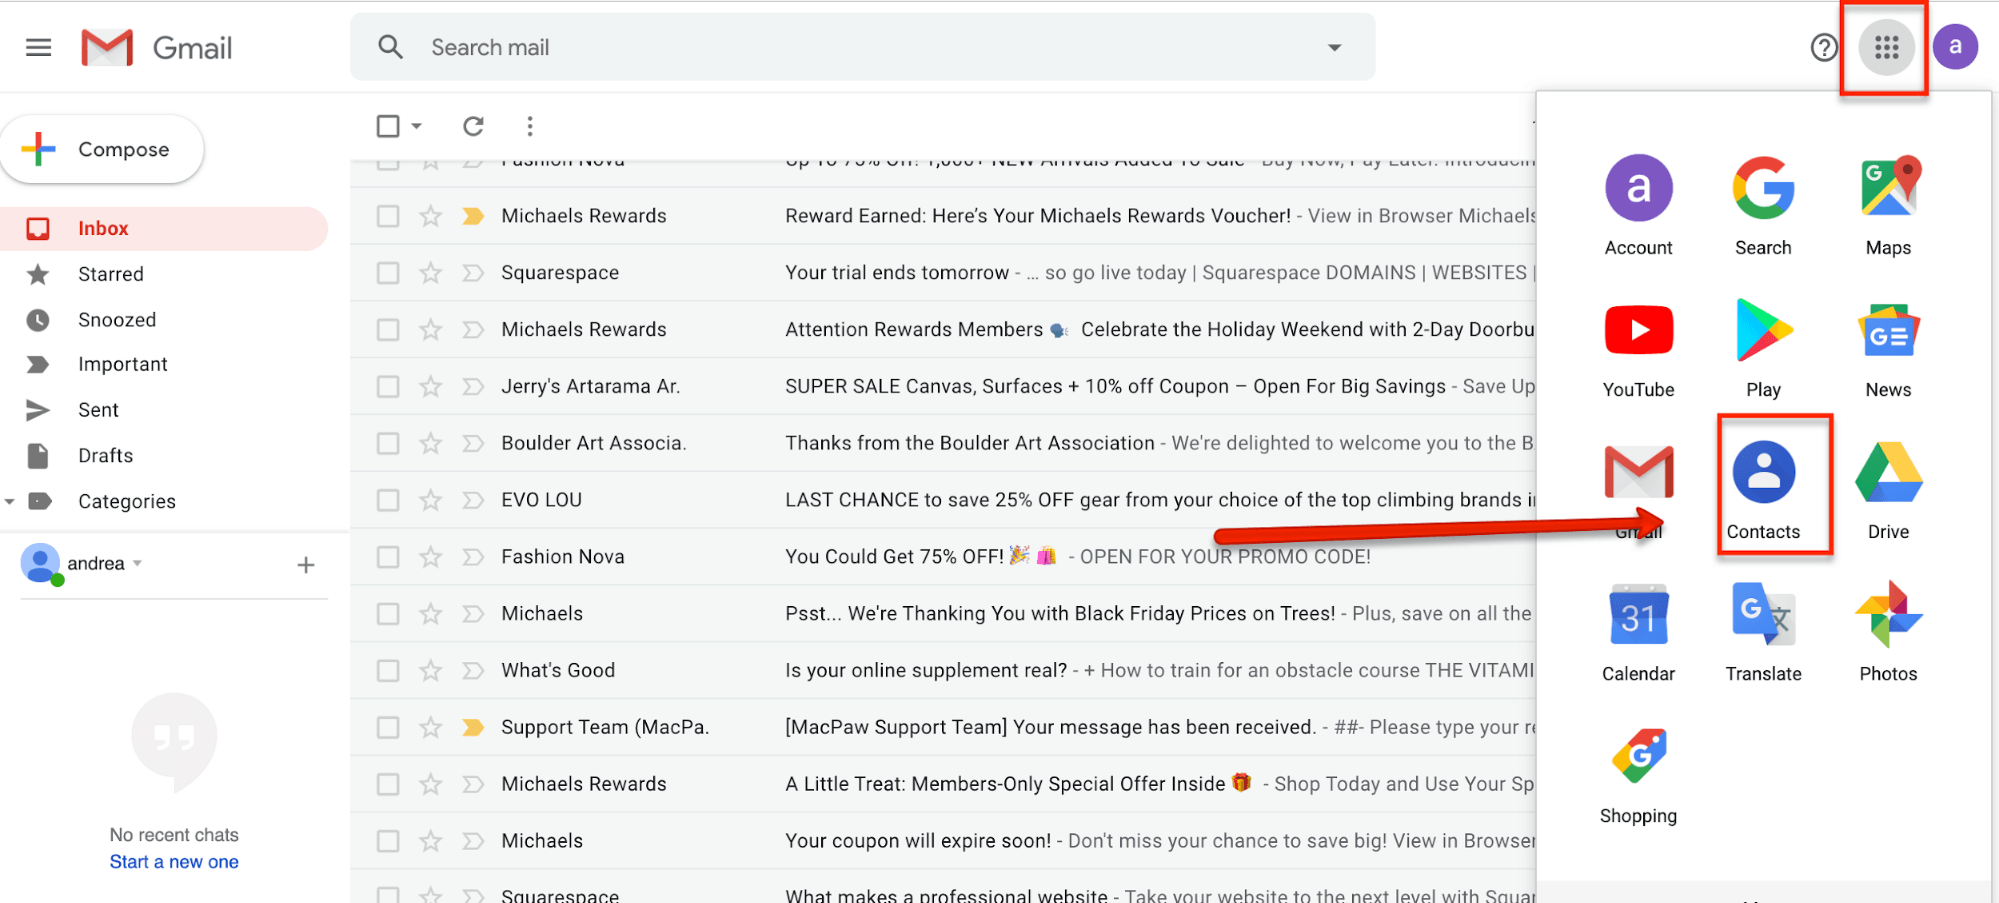
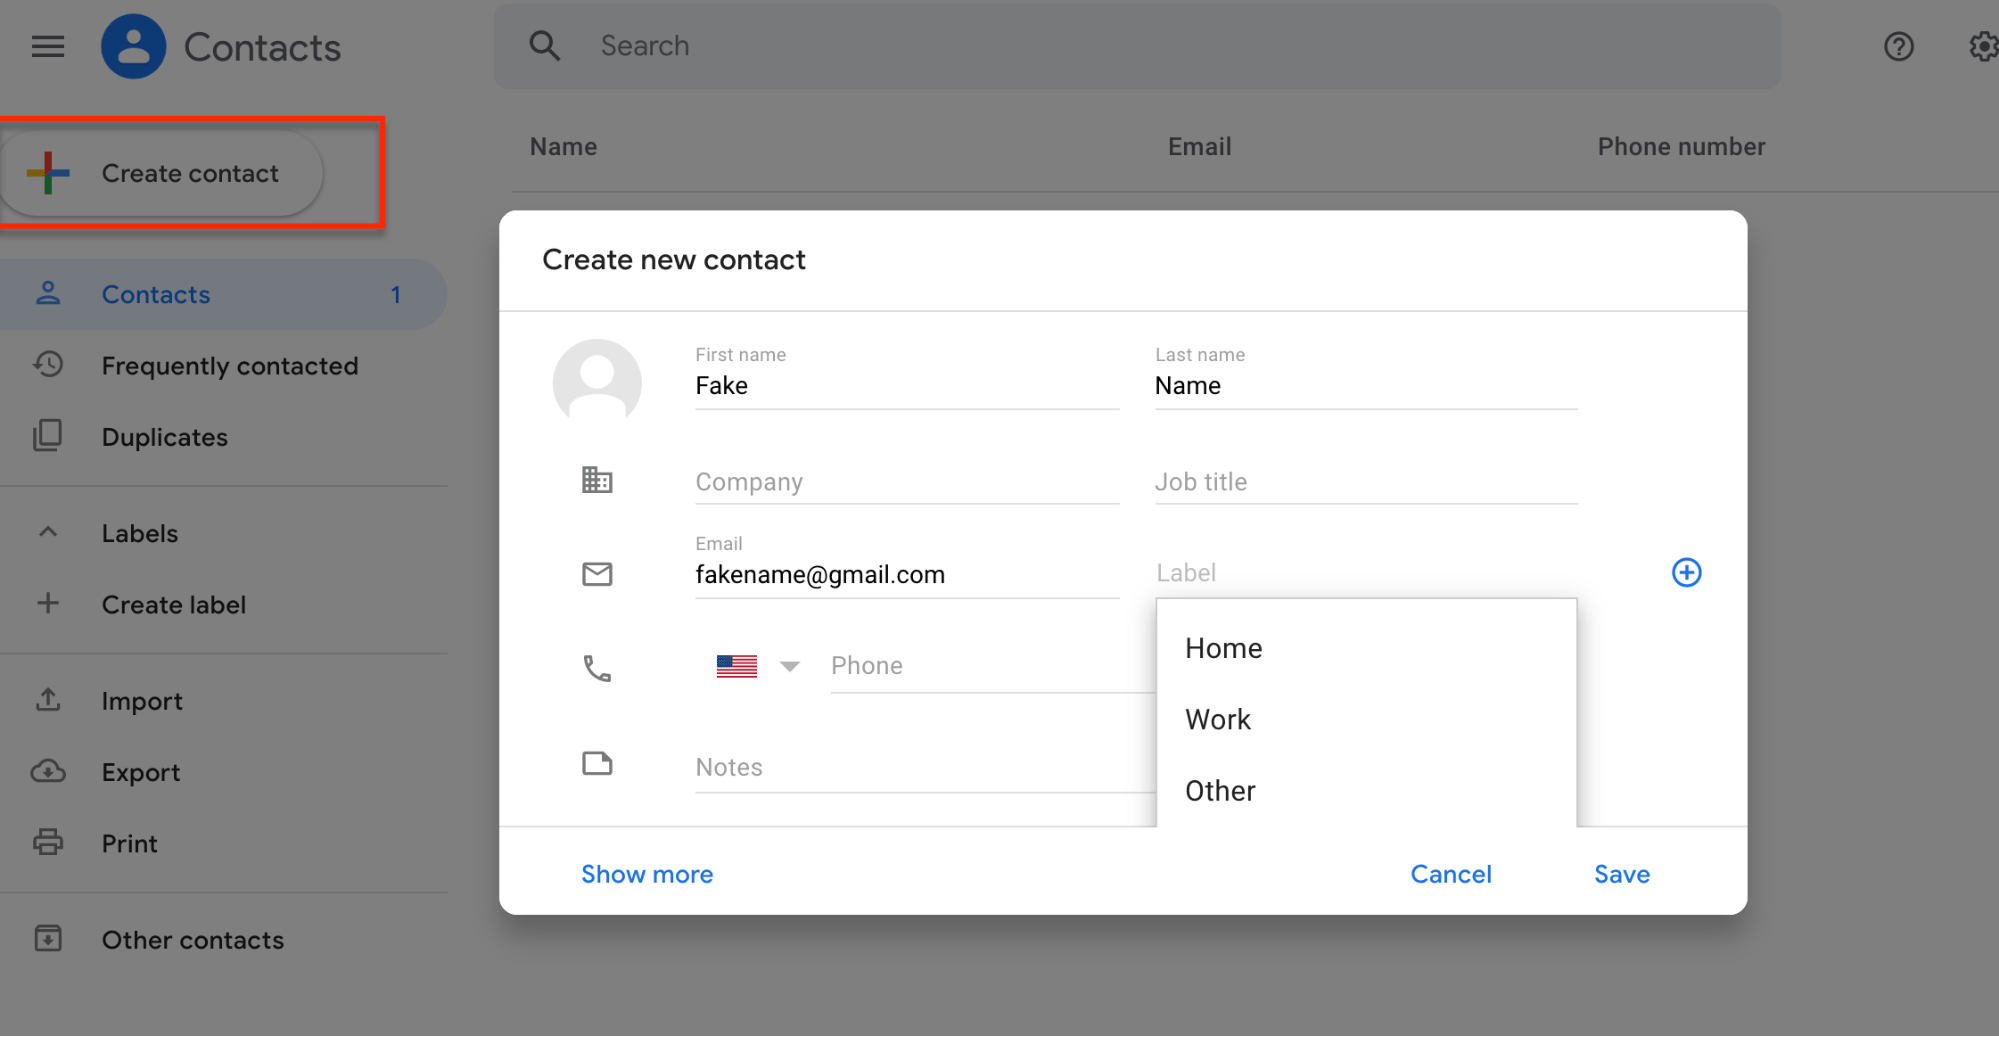
Once you get to the contact page, simply click “Create Contact” in the upper left corner and fill out the contact form. Any emails that come from this person will automatically go straight to your primary inbox.
WHITELIST SPAM ADDRESSES
Often, we only think to whitelist AFTER an email has already made its way to our spam inbox (and it took us a year to find it). Fortunately, it’s an easy fix.
Sometimes, a friend sends you an email that ends up in your Spam inbox before you’ve taken the time to whitelist them. There’s a quick way to fix that as well.
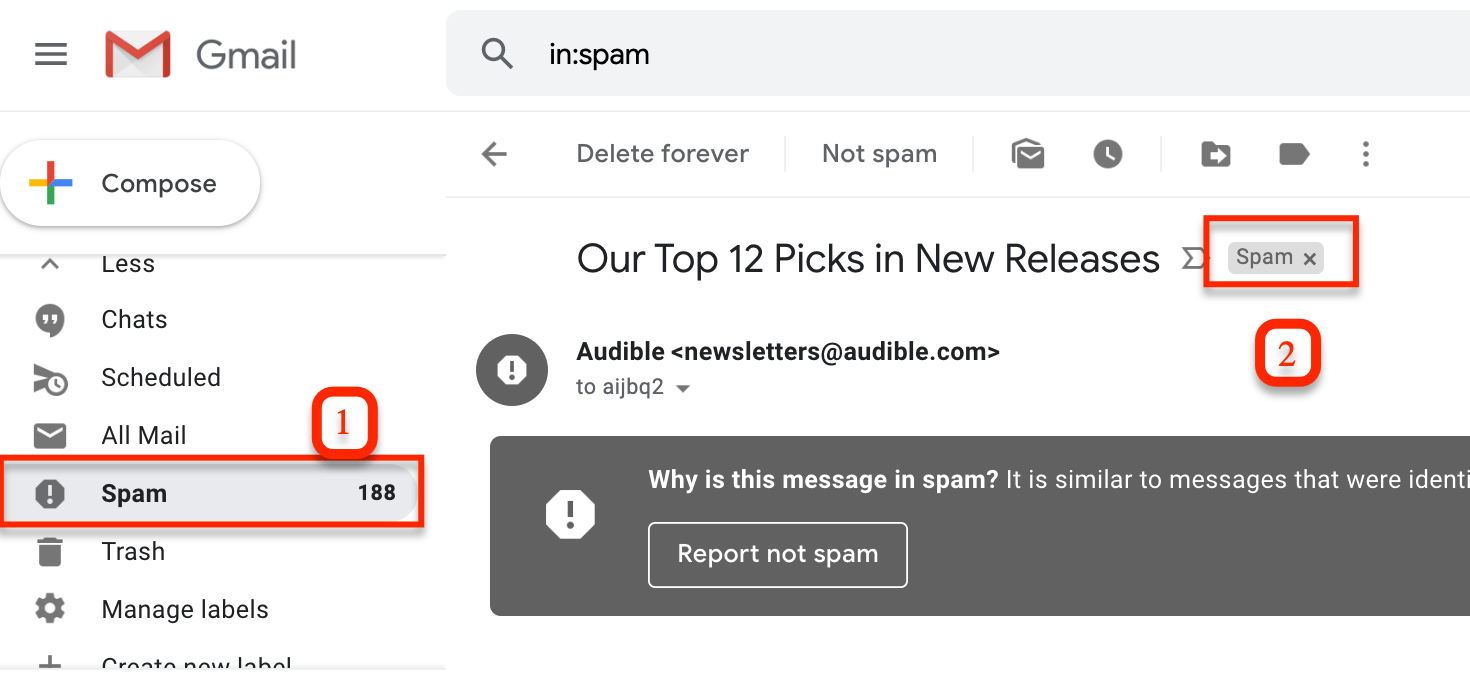
Click into your spam inbox and select the email that came from the person you’d like to whitelist. You’ll see a little tag next to their name that labels them as spam. Simply click the x next to the tag to remove it.
ADD A NON-SPAM FILTER
A simple way to ensure emails go into the correct inbox is to apply a non-spam filter.
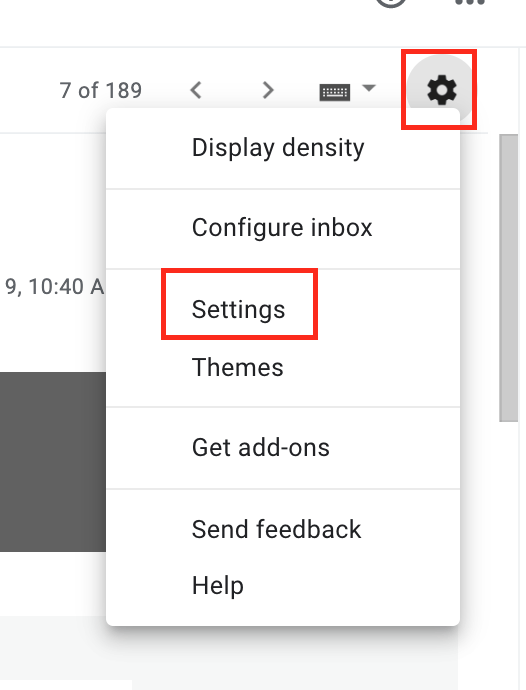
To do this, click the gear icon in your inbox and click settings.
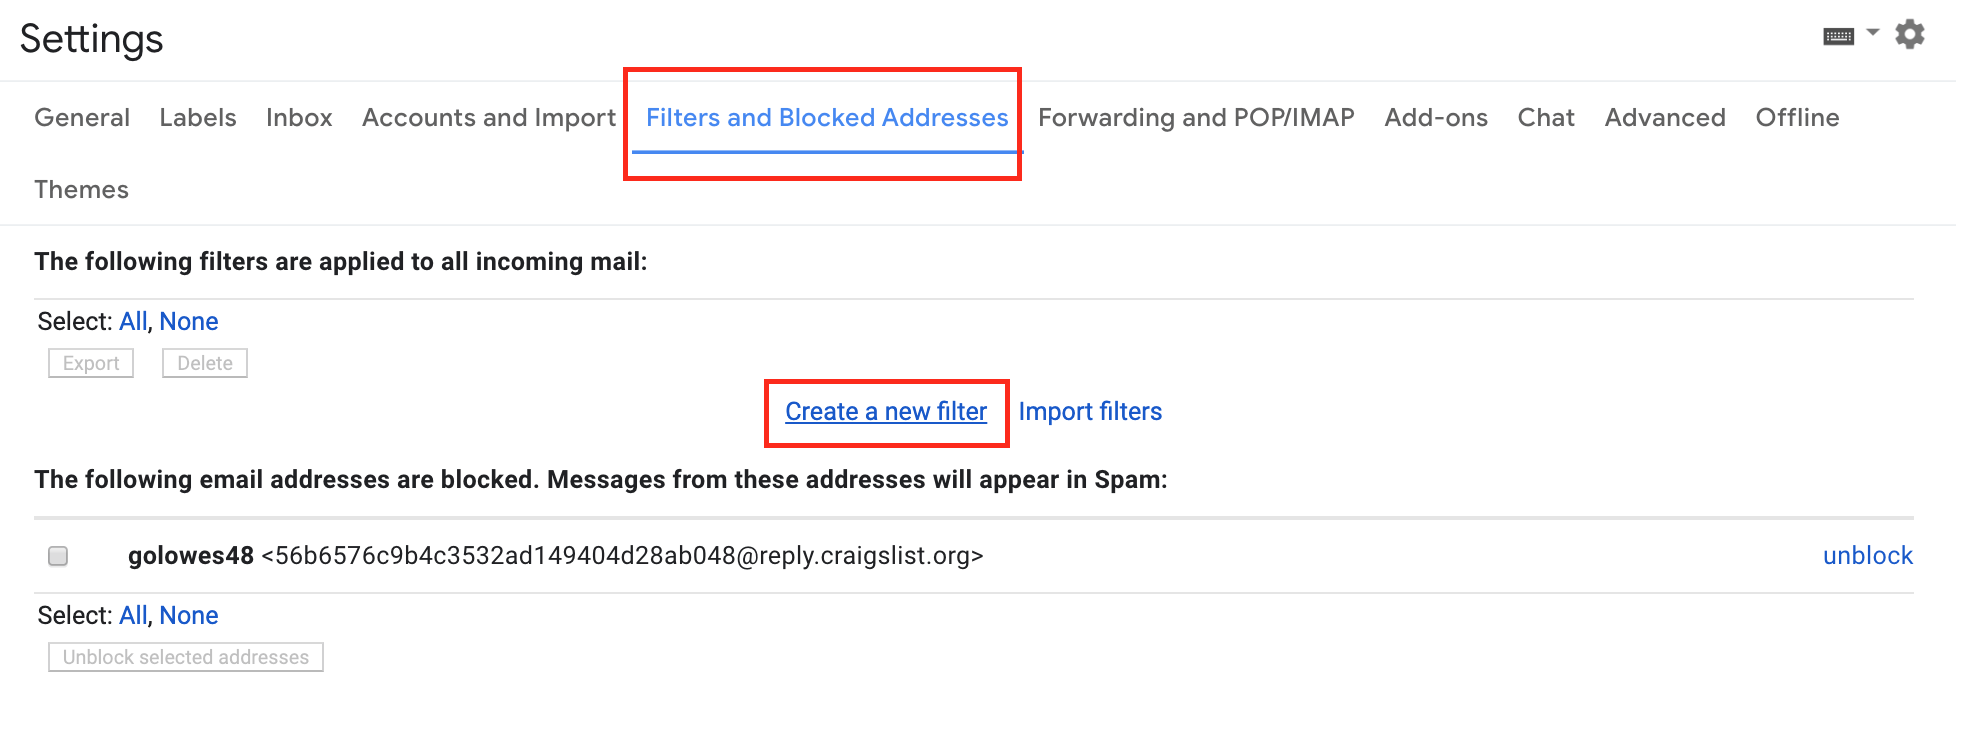
Once the settings page opens up, you want to click the “filters and blocked addresses” tab. From there, select “create a new filter.”
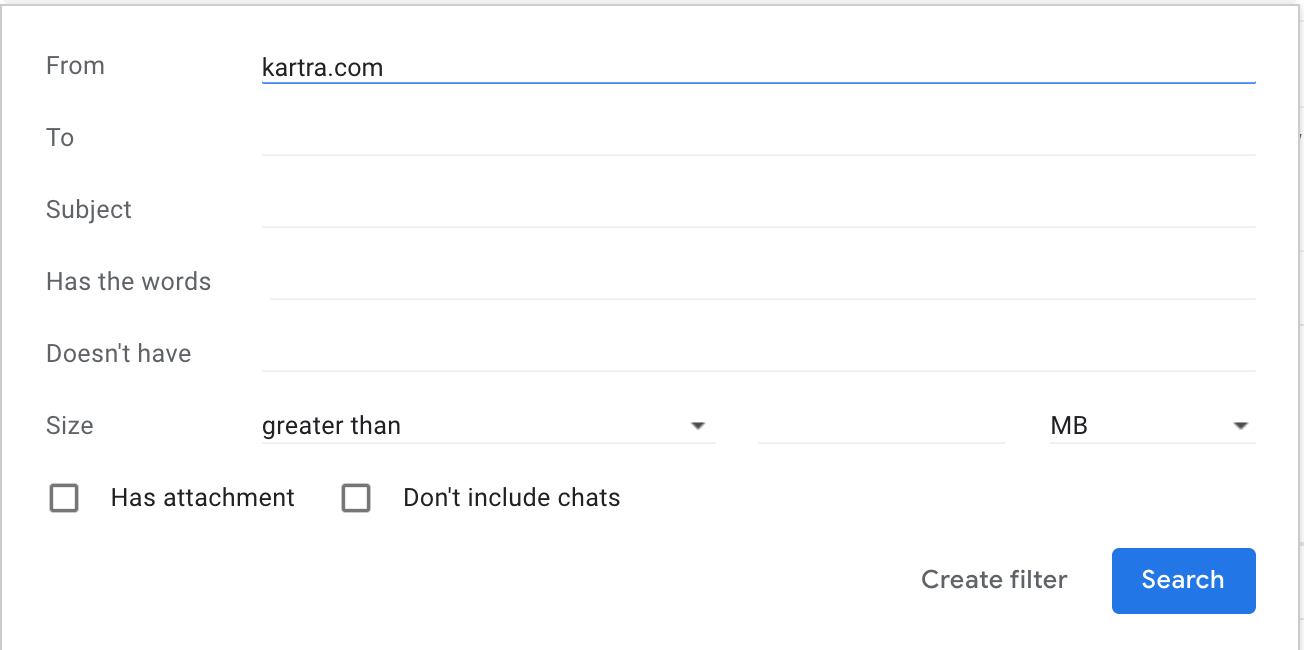
A search mail form will appear. Here you have the option to either whitelist an entire domain if you want to receive all emails from that address (we highly suggest you whitelist the entirety of Kartra.com and/or WebinarJam.com because otherwise, you may miss support or announcement emails). Or, if you just want to receive emails from a specific person at a company, you can choose to only put their specific email address in the “From” tab.
When you’re done, click “create filter,” which is directly next to the blue search button.
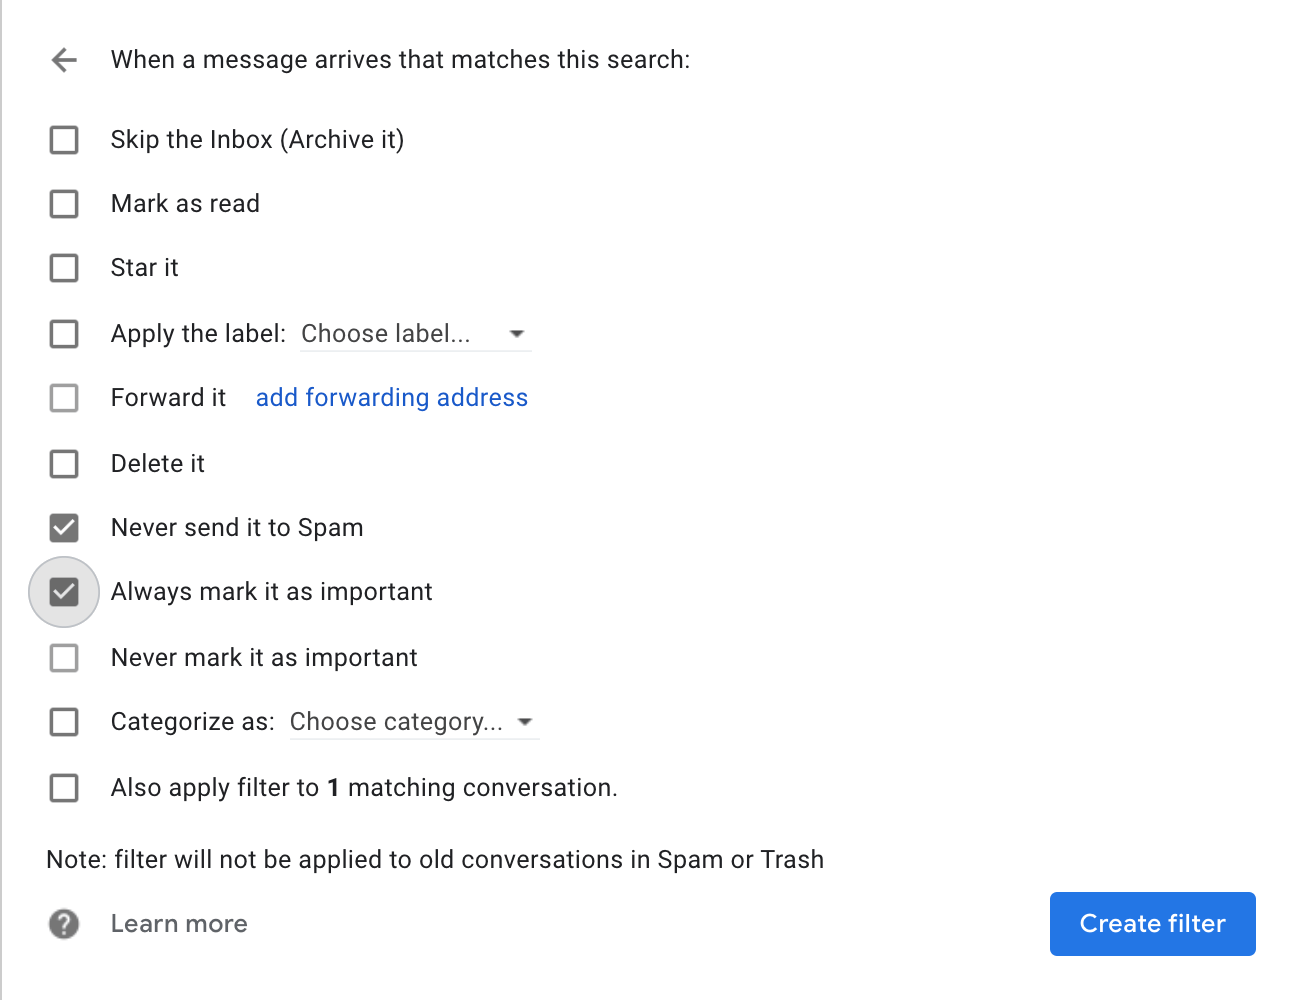
Once you’ve submitted your filter, you’ll see the following screen, where you can designate what label to assign to that email or domain. Click “never send it to Spam,” and if it’s a really important email address, check off “always mark it as important.” Once you’re finished, select “create filter.”
OUTLOOK:
Like Gmail, you can whitelist a contact by either adding them as a contact, or in Outlook’s case using the “Safe Senders” feature.
ADDING A CONTACT:
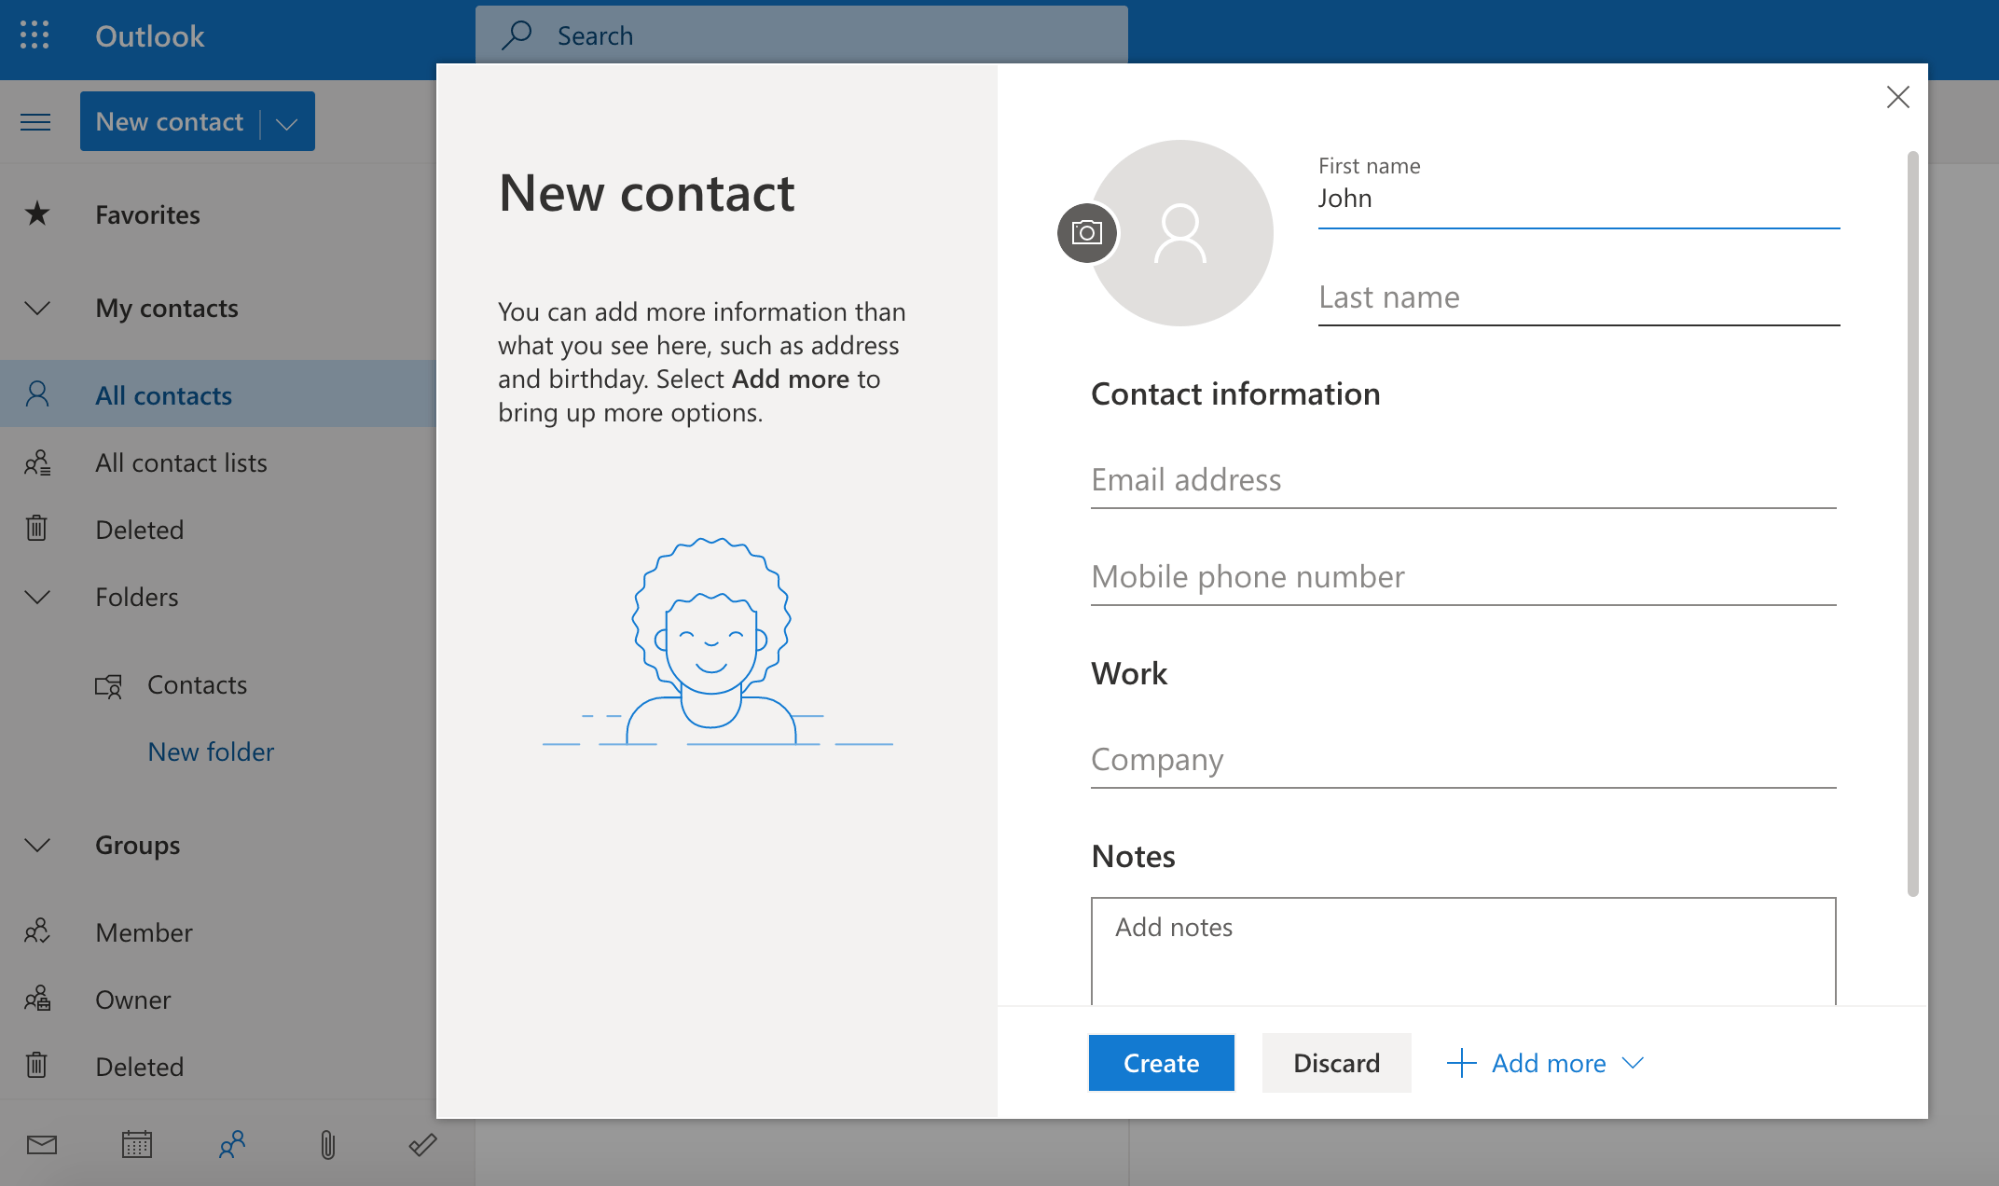
To add a contact, you’ll need to navigate to the contacts section of Outlook. To do this, click the people icon towards the bottom left of the screen. Then, click “New contact” at the top of the screen in blue.
A form will appear. Here you should enter the first name, last name, and email address of the person you are whitelisting. Feel free to add any notes. Once you’re done, click “Create,” and they will be added to your contacts and moved away from your Spam inbox.
ADDING CONTACTS TO SAFE SENDERS
“Safe senders” is essentially the Spam Filter setting in Outlook. And it’s a great way to guarantee the emails you want to receive won’t end up in Spam.
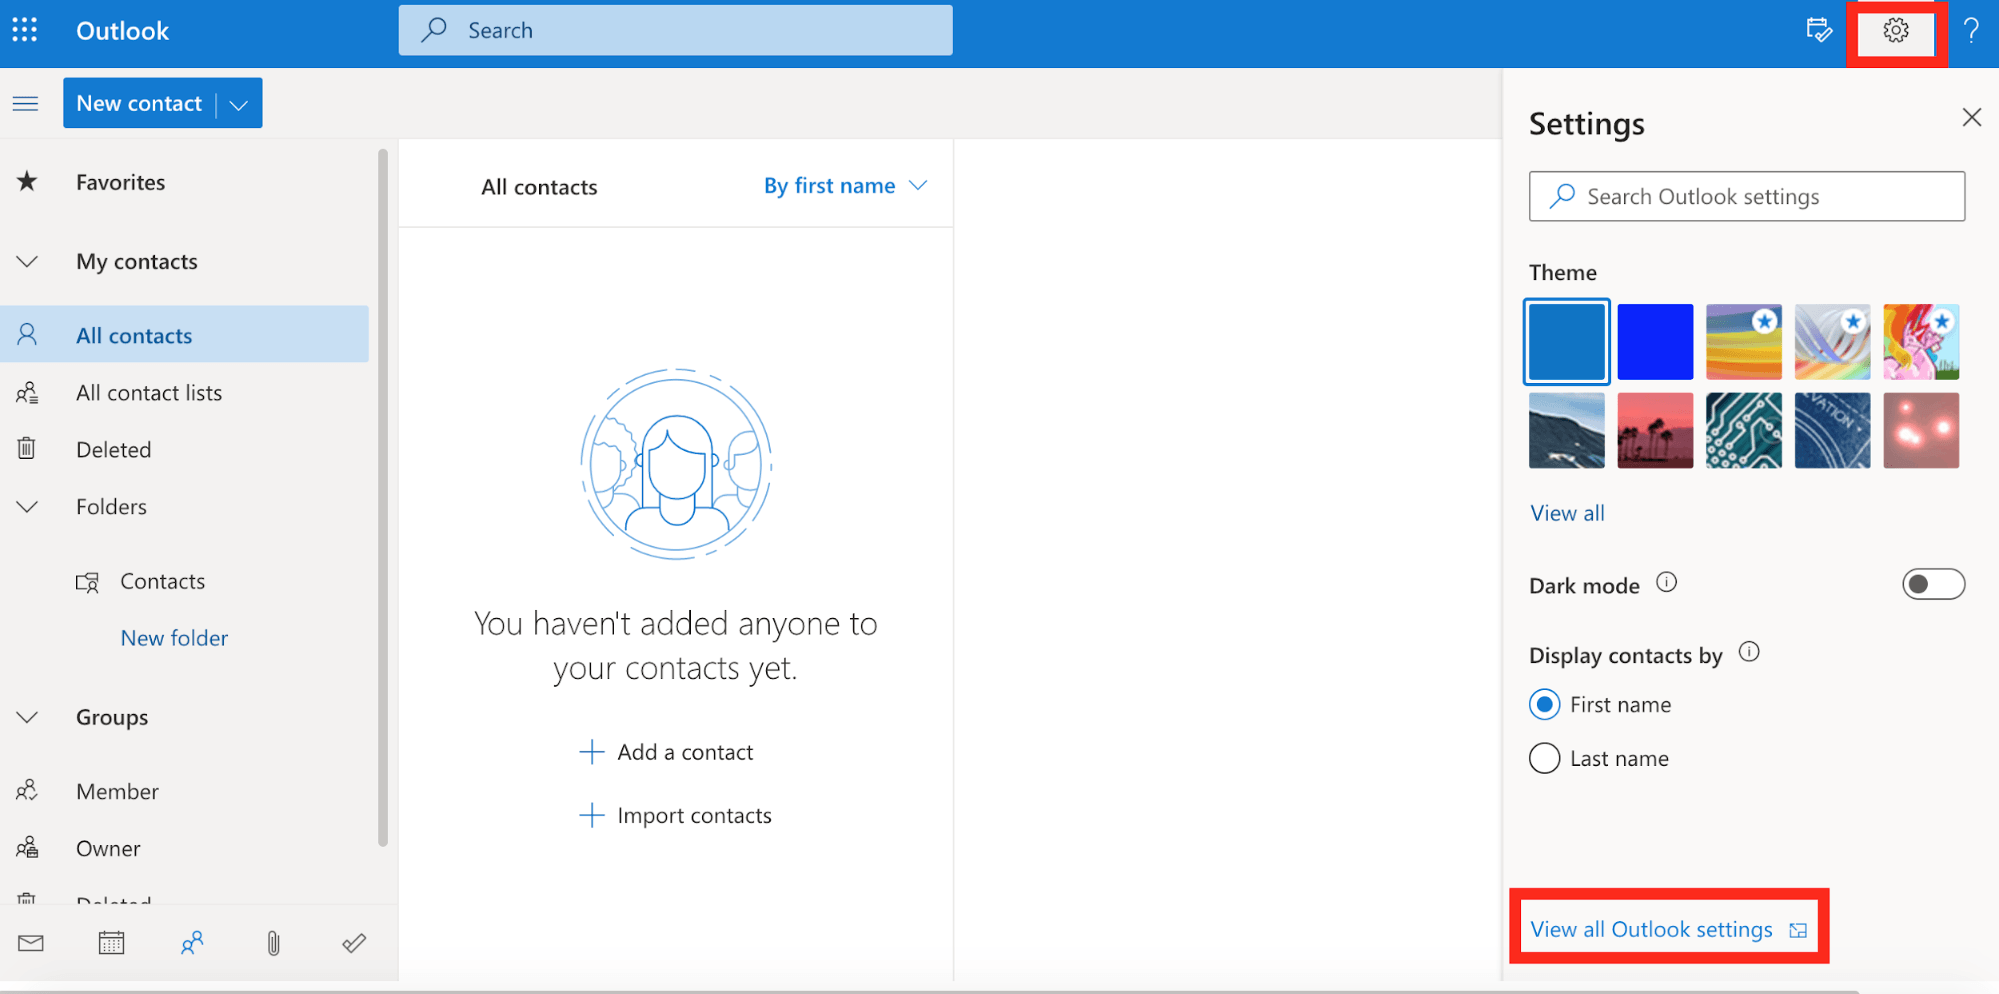
To add someone to Safe Senders, you’ll first want to click the gear icon in the top right corner, and then at the bottom of the pop-up, you’ll want to click “View all Outlook settings.”

Once the settings window opens, you will want to click on “Mail” and then “Junk email.” Scroll to the section that says safe senders and domains and click “Add.” A field will appear that allows you to either type it a specific email or a domain. Fill it out and press the “enter” key on your keyboard to add it to the list.
Make SURE you press the save button at the top of the pop-up when you’re done, or your new safe sender address may not save.
YAHOO:
There are two ways to whitelist an email with Yahoo: you can add it to your contacts or create a filter.
ADDING A CONTACT:
To add a contact, you will want to click the Contacts icon on the right side of your screen. From there, click “Add a new contact.”
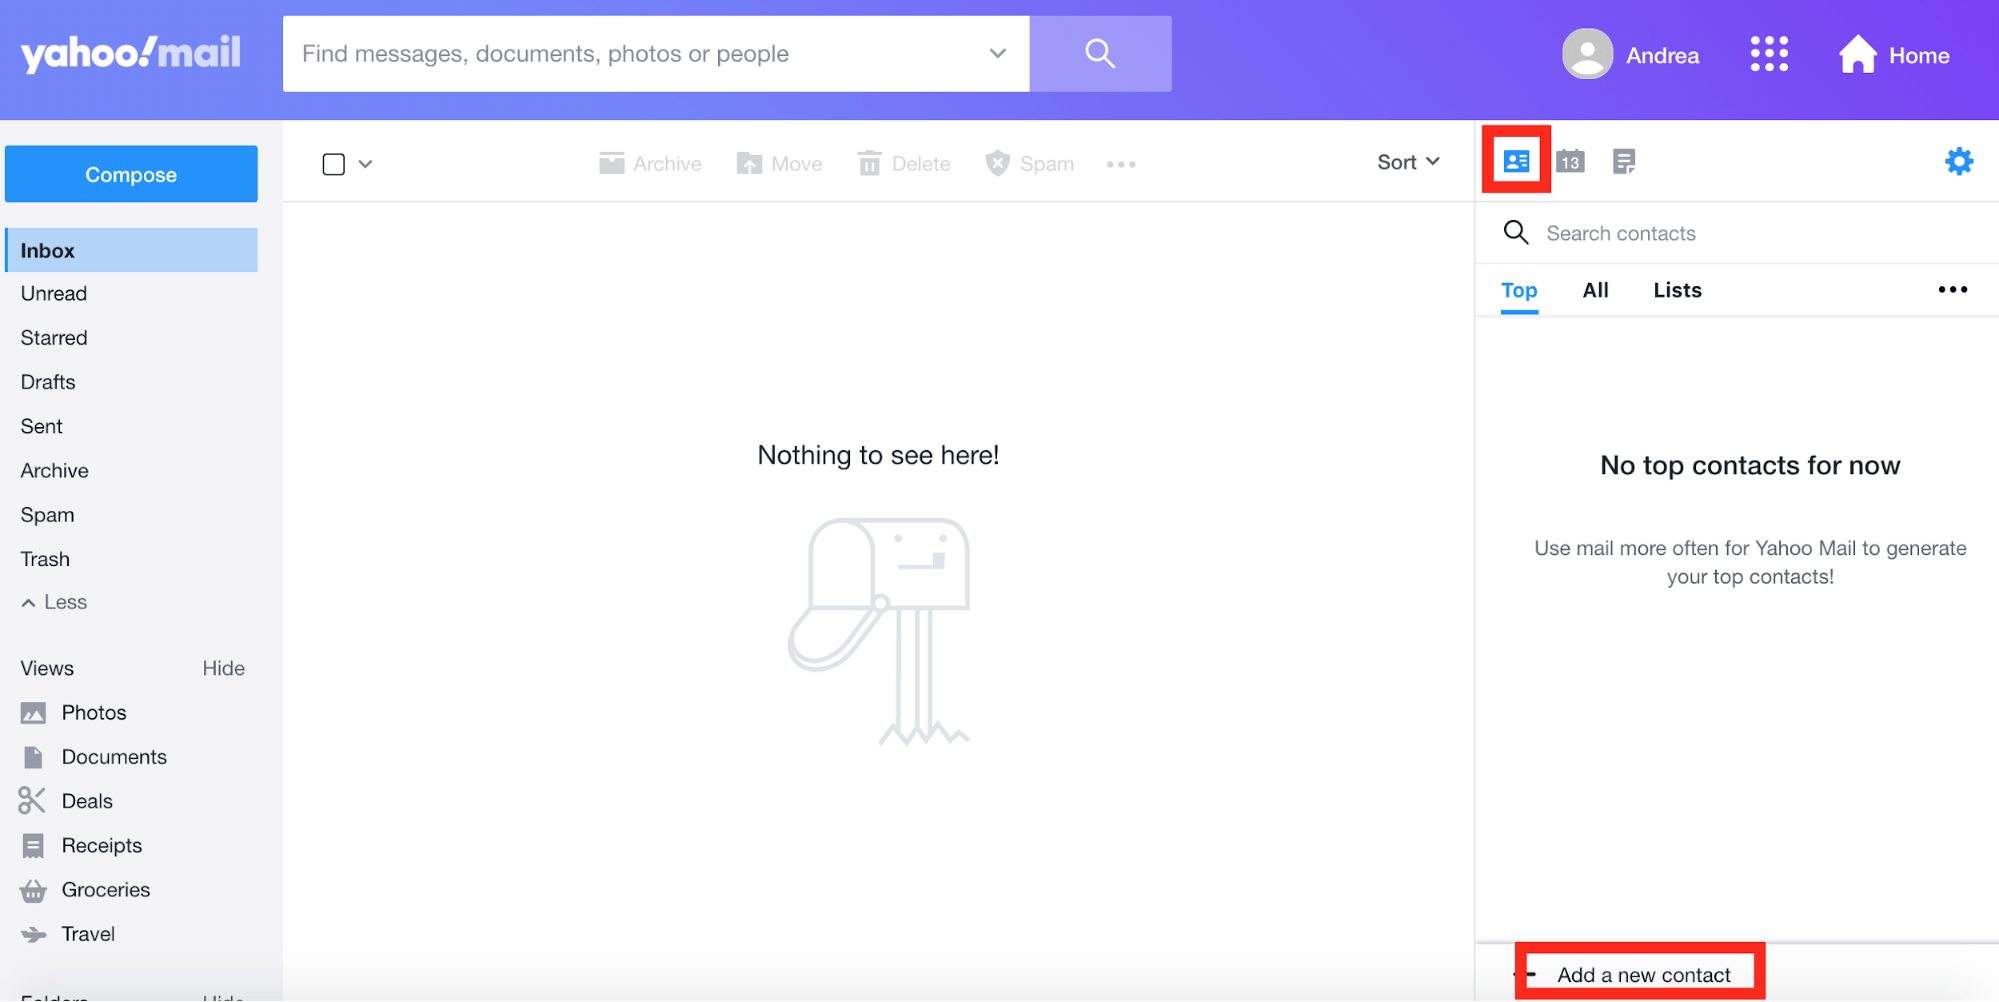
From there, simply fill out the contact information and click Save, and Yahoo will no longer filter this email out as spam.
ADDING A SPAM FILTER:
Similar to Gmail, you can add a spam filter in Yahoo to make sure an email from a domain or address goes straight to your regular inbox.
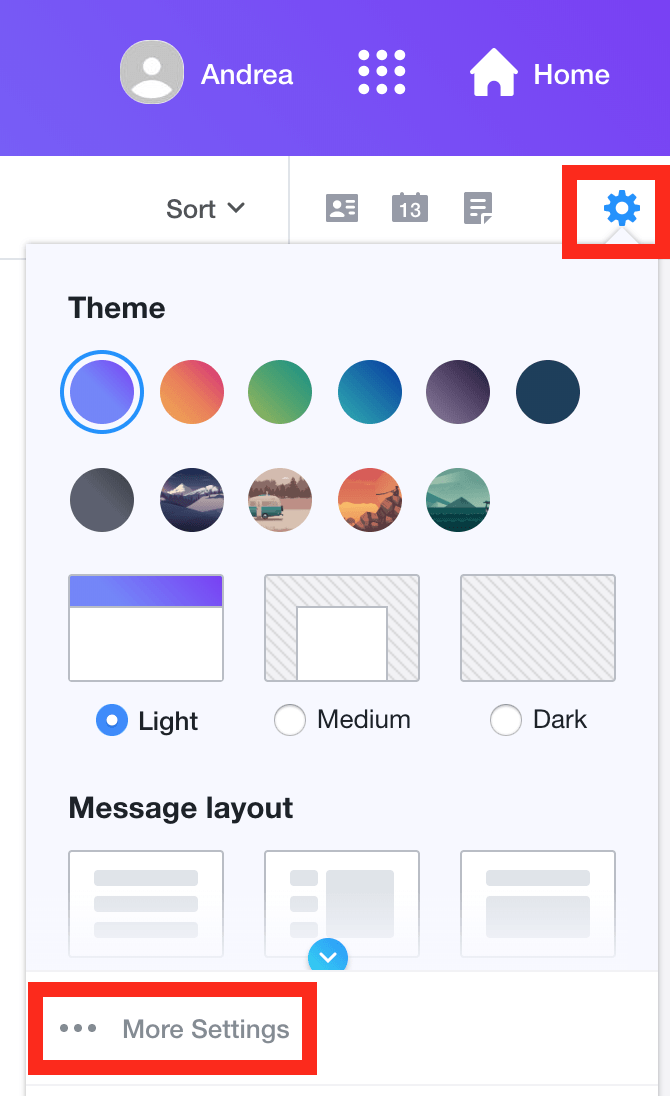
To do this, you’ll need to go into your settings. Click on the gear icon in the upper right corner and then click “More settings.”
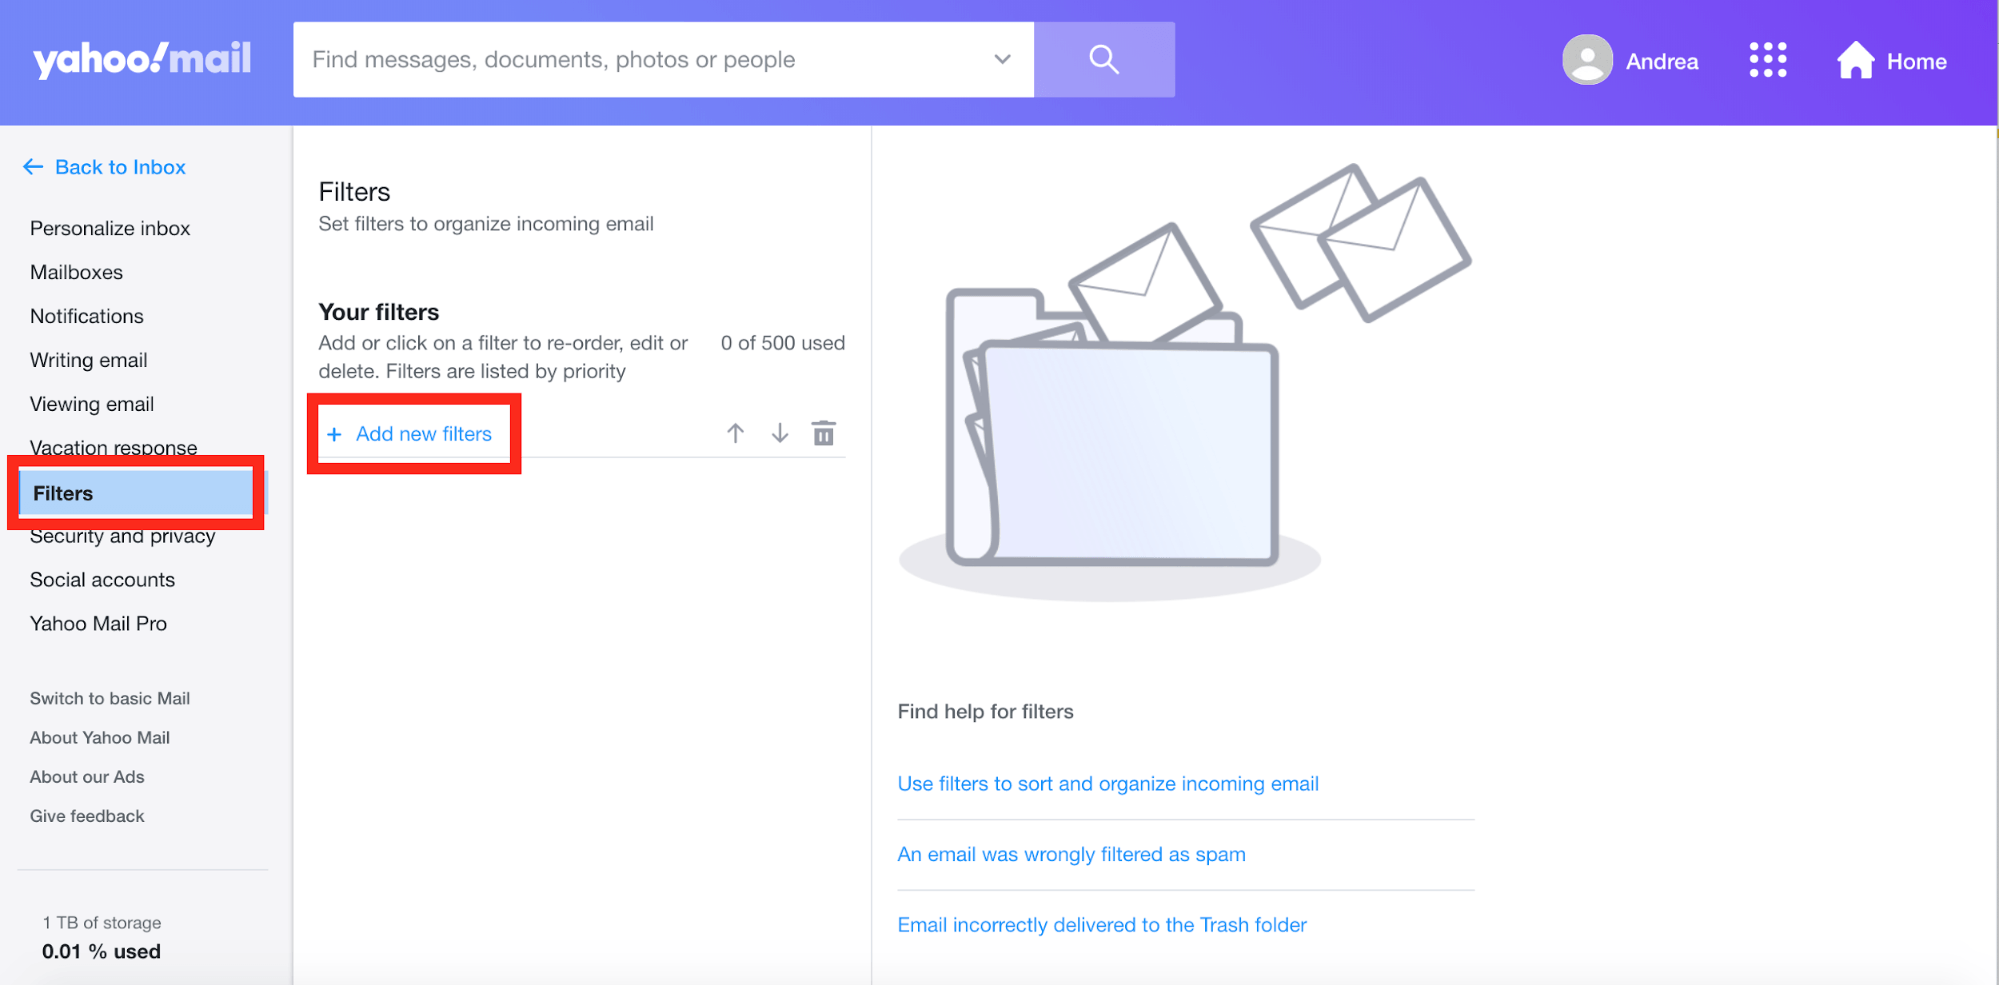
Once you’re on the settings page, you’ll want to click the “Filters” tab and select “add new filters.”
Once the form appears, you’ll want to give the filter a name. You will then need to add either the domain or the specific email address you want to whitelist. You can select an exact folder you’d like it to filter to, although the filter will default to moving all incoming mail to your inbox. Once you’re done, click Save.
This new filter will now show up in the filter’s tab in settings using the name you assigned it.
COMCAST:
They may not be the most fun provider to get support from (hello hour-long waits on the phone), but they are one of the biggest internet service providers in the country, and they provide all their customers with a free email account. Like the other providers above, there are a few ways to whitelist contacts with Comcast.
XFINITY CONTACTS
To add a contact in Comcast, go to your email account and click the “Address Book” tab and then click the create contact icon.
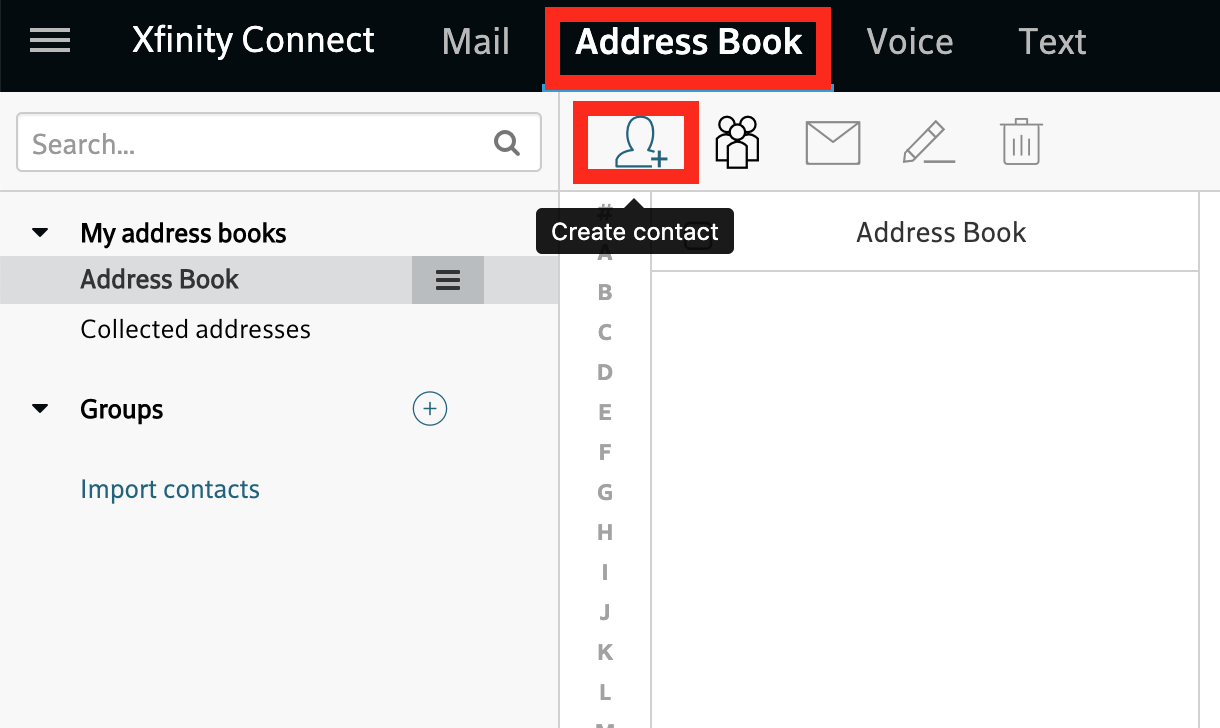
A form will pop up; simply fill it out as detailed as you’d like and click Save.
If you want to add a bunch of contacts at once and speed up the process, simply import contacts from your other email accounts.
To do this, navigate back to the address book tab, and click the “import contacts” link in the left navigation.
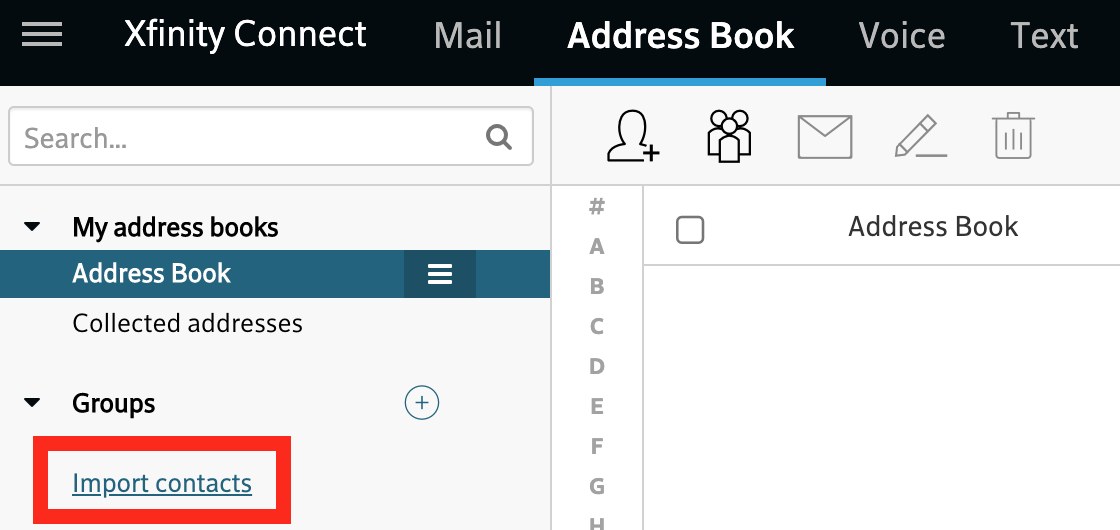
From here, you will be directed through a wizard that will help you import your existing contacts from another email provider or from a file.
WHITELIST EMAIL FILTERS
By now you’re probably noticing a trend. You can create a filter to guarantee incoming emails from a certain sender or site make it directly to your inbox.
To do this in Comcast, simply click the gear icon in the upper corner and tap “settings.”
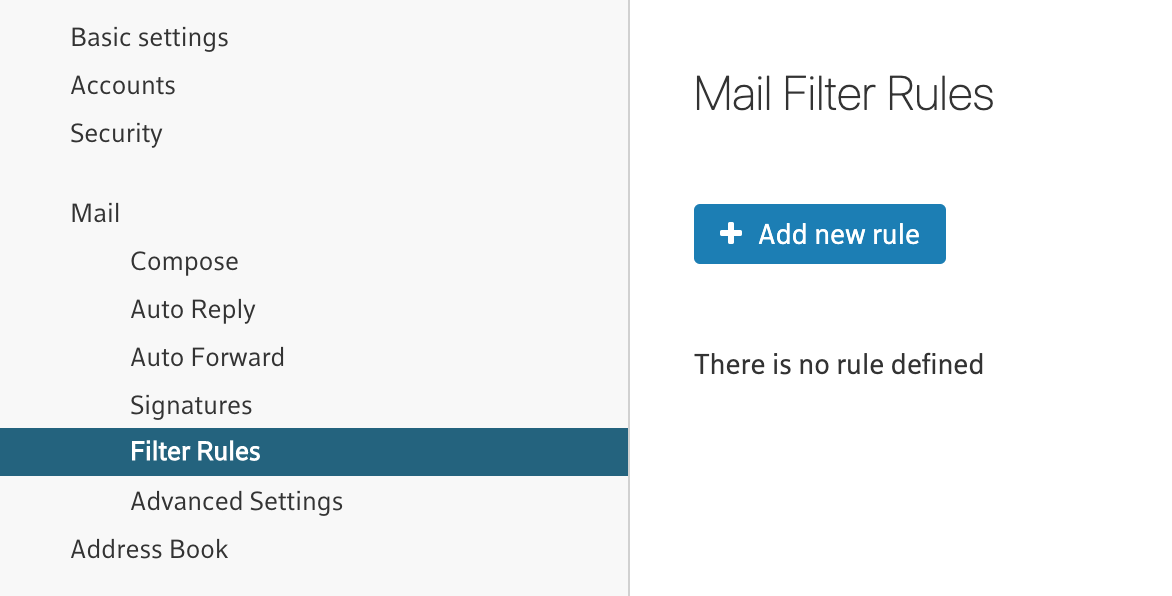
A form will appear. You need to create a name for this rule; we recommend going with the name of the sender here. Then under “conditions,” choose Sender/From, and enter the email address or domain you’re trying to whitelist.
Then, under “add action” add “Keep” (this is important to ensure that any emails that come from this address end up in your inbox). Now, click Save to add this rule to your email account.
EMAIL SAFE LIST
Comcast has a unique setting called “safe list.” When this setting is enabled, ONLY people whose emails you’ve designated as “safe” will show up in your inbox. Everything else will head straight to spam.
This is great if your Comcast email is designed for a very specific set of work where you only communicate with a small subset of people. However, it can also be damaging because it means you’re likely to miss a lot of possibly very important emails.
To check if your Safe List setting is on or off, go to “advanced settings” under Mail, and check or uncheck the safe list option (again, we recommend unchecked).

PERSONAL DOMAIN
This last one is a bit more technical, but it’s for those of you that use a web host for your personal domain and then choose to configure an email account to go with that domain through a cPanel web host.
Fortunately, whitelisting is fairly easy to do from inside the cPanel itself.
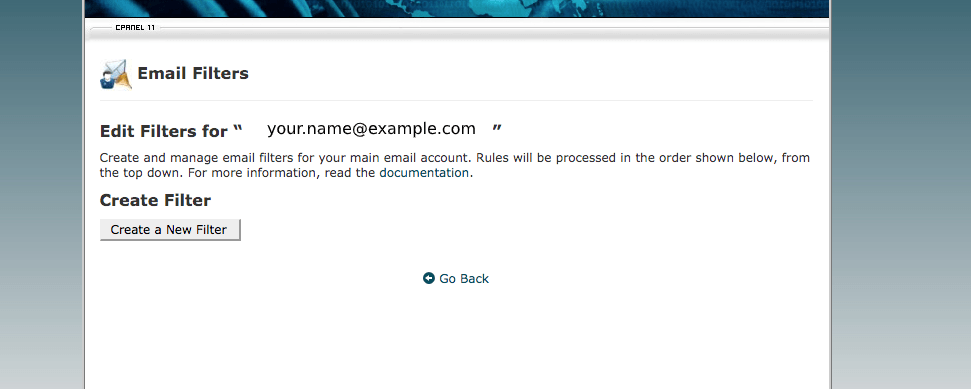
First, you will want to login to your web hosting account and go into the CPanel. From here, find your email and select “email filters.”
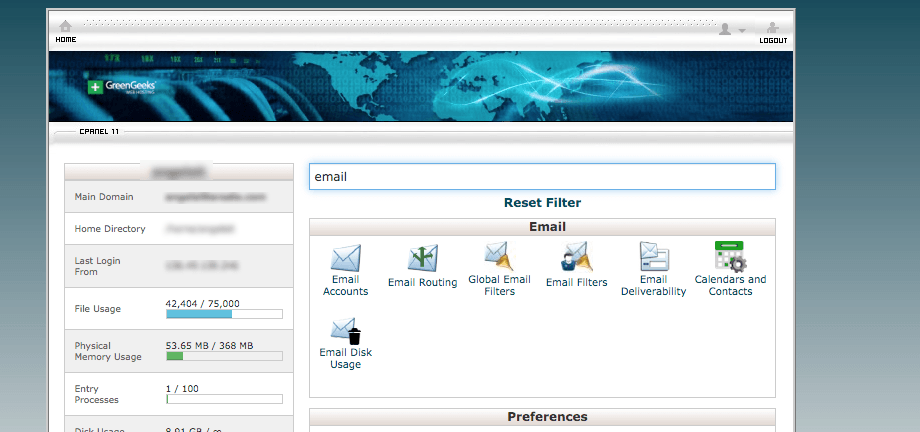
When you’re in the email filters area, click “Create a New Filter.”
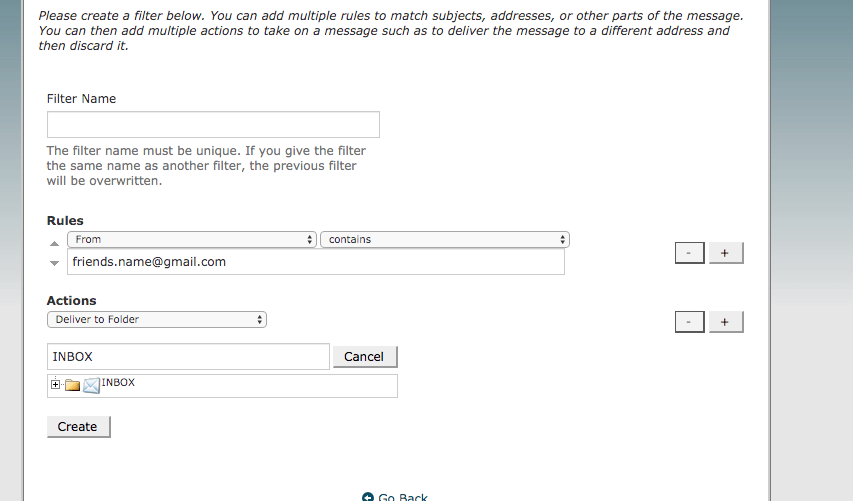
Once you’re on the filter form, make the filter name or rule the name of the person/business you are trying to whitelist. Then, under rules select “from” in the dropdown list. Here you enter either the sender’s name or the domain you want to whitelist. Make the action “deliver to folder” and specify where you want it to go (likely your inbox).
When you’ve finished setting this up, click the “Create” button.
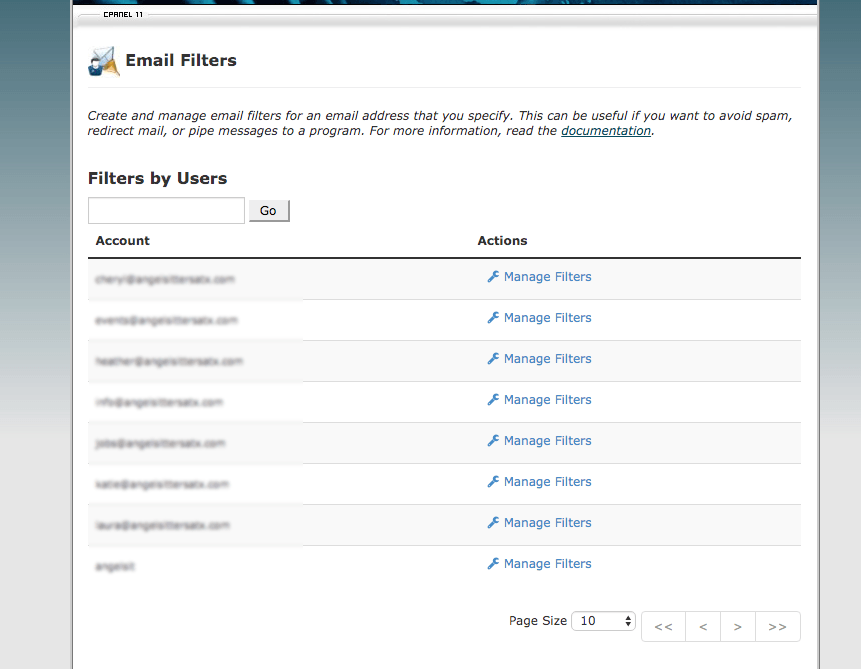
This new filter should be in your set of filter rules now:
And there you have it! It’s quite easy and incredibly worthwhile when the email comes from someone important. If you dedicate a little bit of time, you can mark all the junk as spam and whitelist all the critical emails and watch your inbox become much more curated, and the Monday mass delete can become a practice of the past.
