What makes a good webinar a great webinar?
Glad you asked. To be honest, the answer is a lot of small details, such as good audio, HD video and an awesome webinar platform (cough cough). They might not seem like a huge deal when you’re first starting out but, trust us, they add up. No matter how great a speaker you are or how interesting your topic, if your video is blurry or your audio keeps cutting out, people are going to leave and your conversions are going to drop.
That’s why it’s crucial to have a good webcam, a solid web microphone and other webinar equipment at your disposal. And no, your laptop or desktop camera and microphone do not qualify as quality equipment.
Our support team often gets asked for recommendations so we’ve decided to compile in one place the best webcams, microphones and headsets to help your next webinar be great.
Note: we have included approximate budget for each piece here; these may change over time and depending on where you purchase them.
WEBCAMS:
If you think back to well over a decade ago, you needed an external webcam to do any sort of video on the web. Flash forward a few years, and every computer has a built-in webcam. Common logic might tell you built-in is superior…but here’s a not-so-secret secret: an external webcam can do things — like zoom, pan and autofocus — that your built-in webcam can’t. Not to mention, you can always update your webcam as newer technology comes out if you want a higher quality picture (it’s a lot cheaper than replacing your whole computer).
However, if you’re one of those presenters who can’t stand being on camera and would rather pop in a pre-made video or slideshow… don’t skip this section. You must have a webcam for WebinarJam to work — even if you don’t plan on being on-screen much.
Now without further ado, here are our top five Webcams for your webinars:
Logitech HD Pro Webcam C920
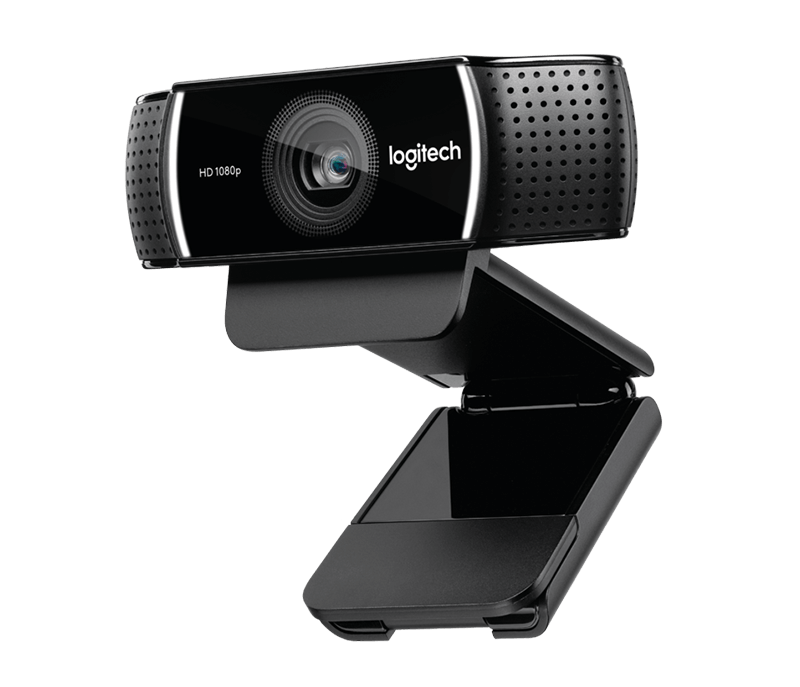
The Logitech C920 may just be the reigning champ. This is the webcam we recommend most often to our customers, and the webcam we see pop up most in discussion boards. It is both high quality and affordable (only about $50). The C920 has a glass camera with auto-focus, digital zoom, has automatic low-light compensation, and can stream in full HD at 1080p with 15 megapixels. Plus, this camera is compatible with Mac, PC and Chrome OS.
One thing to note: this camera does have a built-in dual microphone, but the sound it produces isn’t great. We’d recommend getting a separate mic from the list below for an optimal webinar.
Logitech C922x Pro Stream Webcam

Next on the list is another Logitech webcam. This webcam is a little pricier than the C920 (get it for $80), but was specifically designed for quality live streaming… well… technically it was designed for the gamers out there, but you can absolutely use it for your webinar. Similar to the C920, the C922 can digitally zoom, autofocus, correct poor lighting and stream in 1080P at 30/frames per second. However, it has a few extra features thrown in. Want a more fluid experience? This camera can stream in 720P at 60/frames per second. It also has a dynamic background replacement feature.
Logitech HD Laptop Webcam C615
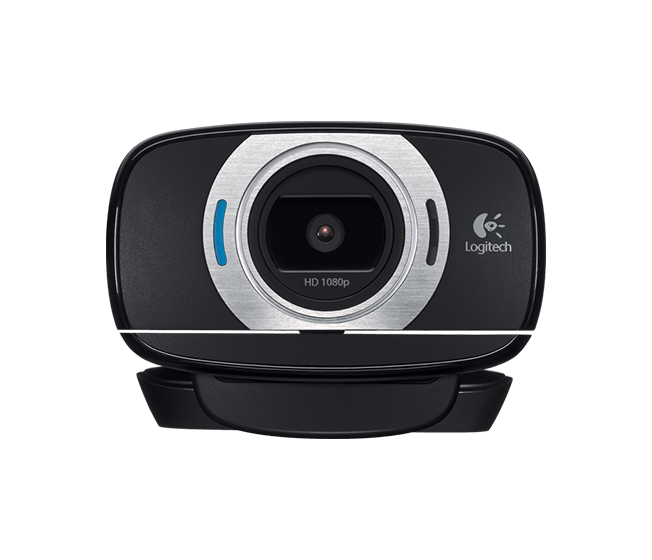
If you’re looking for a lower-budget webcam to take on the road, there’s no better match than the Logitech C615. This nifty webcam has a unique “fold and go” design, making it easy to pop in your bag and travel on-the-go.
But don’t think its portability compromises its quality. The C615 can stream in HD 1080p, and features eight megapixels, 360-degree swivel capabilities, autofocus, low-light correction and even has a tripod-compatible base. Get it for only about $35.
Microsoft LifeCam Studio
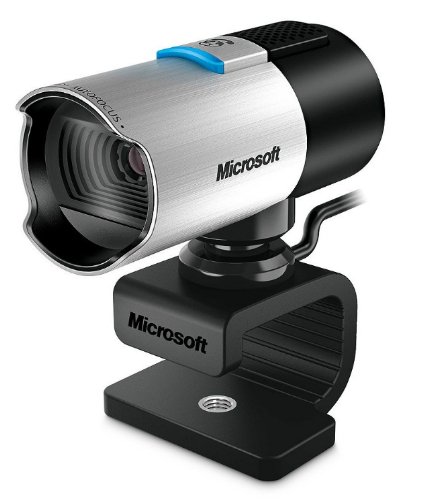
If you’re a PC-user looking for something outside of Logitech, the Microsoft LifeCam Studio is for you (note: it is not compatible with Chrome OS or Mac). Not only does it have a stylish security-camera-like finish, but it is also a powerful little tool. It can stream crisp 1080P HD video and has true-color technology that automatically controls exposure. Like some of the cameras above, it can rotate 360 degrees and be mounted on a tripod. While we still recommend an outside mic, the Microsoft LifeCam Studio uses a wideband mic to deliver better sound than many of its competitors. You can get this webcam for about $59.
Logitech BRIO
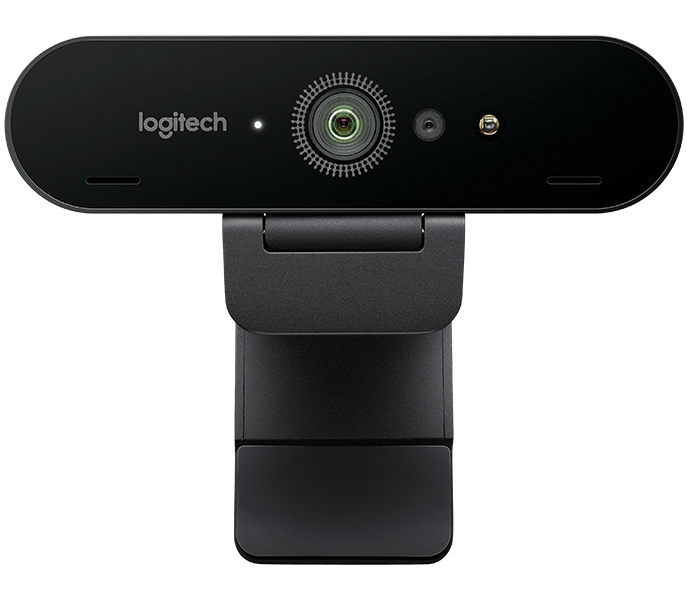
If you like to always be on the leading-edge, consider purchasing a Logitech BRIO. Word of caution – this camera is by far the most expensive on this list, coming in at $159.99. However, it also has some unique features that other webcams have yet to match. Not only does the BRIO stream in 1080p and 720p, but it also has 4K abilities (in case you don’t speak tech, that means 3840 pixels x 2160). Get ready for some crystal-clear video. This camera also has 5x digital zoom, RightLight™ lighting correction and infrared security sensors.
However, there are a few drawbacks. While this camera is compatible with Chrome OS, Mac and PC, some of its features will only work on newer devices, and it requires a USB 3 port for 4K. Additionally, it requires a lot of bandwidth to stream in 4K, meaning that feature may be best for pre-recording videos as opposed to your live webinars.
Microphones:

If you clicked on the links included in the webcam section, you might have noticed that they all have built-in microphones. And since you live in the modern era, your computer probably has one too. So you might be asking… why do you need an external microphone?
You see, those mics are probably fine for a casual webchat with a friend. But for your webinars they often fall flat. For one, let’s just think about the size. An external mic is often as big, if not bigger than your webcam – so how can that webcam fit the same quality mic in a tiny place? Answer: it can’t.
Additionally, built-in mics often pick up all the sound coming its way. That means if you have any ambient noise (including your computer fan humming oh-so-loudly), your webinar viewers will hear it too. External microphones, on the other hand, are much better at filtering sound and giving your viewers clear and crisp audio that is pleasant to hear.
Before we dive on in with our top five picks for microphones, it’s important to understand the two main types you’ll find on the market.
First, there’s a dynamic microphone. These microphones work using electromagnetic induction. In English, this means the microphone uses a magnetic field to determine where the audio is coming from and receive it. As a result, these mics are durable, good for loud sounds (think drums) and have lower sensitivity (both good and bad as it won’t pick up as much ambient noise).
Condenser microphones, alternatively, use a fixed back plate and a thinner, flexible front plate to detect sound waves. As a result, these microphones are more sensitive and tend to be used by recording artists for their high quality. However, if you ever do webinars in noisy places, they’re probably not the right choice for you.
Regardless of which style you prefer, all of these microphones will do an amazing job clearly transmitting your voice to your webinar attendees.
One thing to note: You must have a webcam as well as a microphone in order for WebinarJam to work (yes, even if you want to share videos/slideshows only).
Blue Yeti
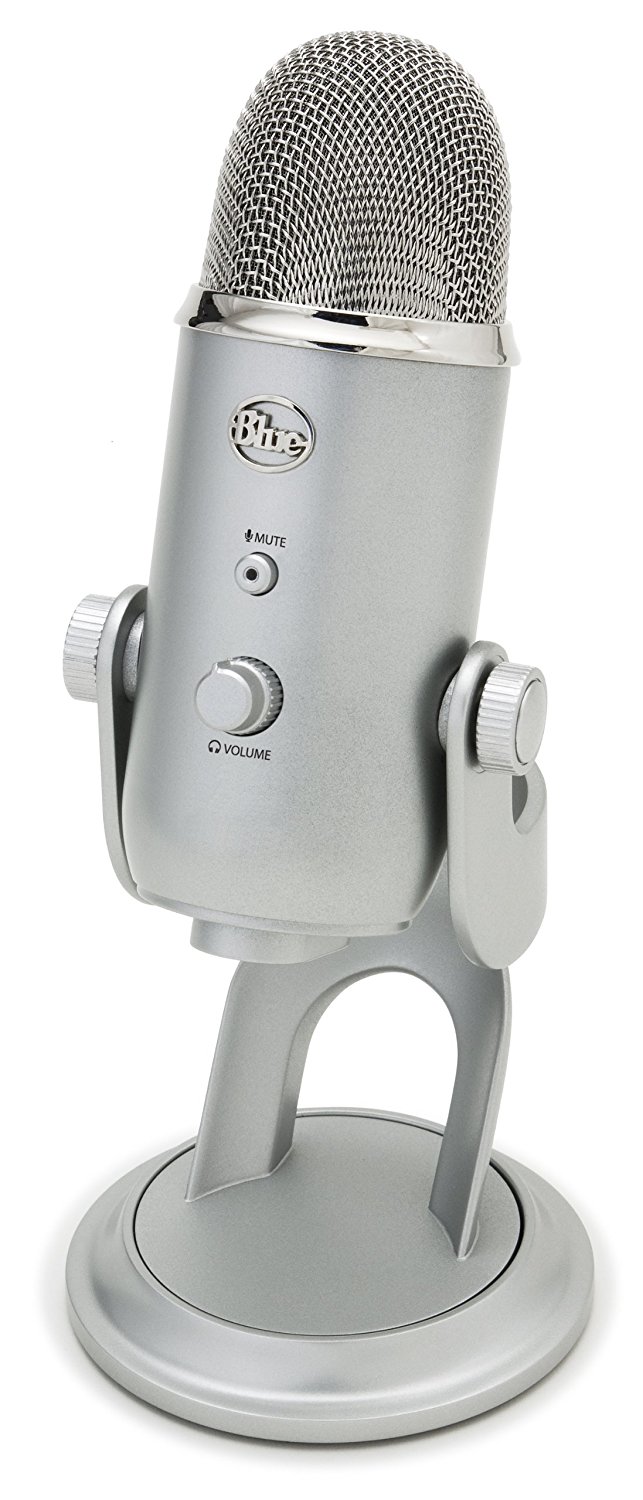
Retro in style, this modern-day microphone is our top pick. The Blue Yeti is a condenser microphone that plugs in with a USB and is compatible with both Mac and PC. The Blue Yeti gives you a lot of control compared to most microphones. You can choose the pattern selection (how the mic picks up sound) and even adjust the sensitivity while you’re speaking. This is super handy for those times when you hear feedback. It also has an instant mute button, which is great for when you need to pop a video into your webinar or let an attendee speak.
If you like to use headphones while recording an automated webinar or while speaking live, just plug your headphones into the built-in headphone jack. Get the Blue Yeti Microphone for $108.
Blue Snowball iCE
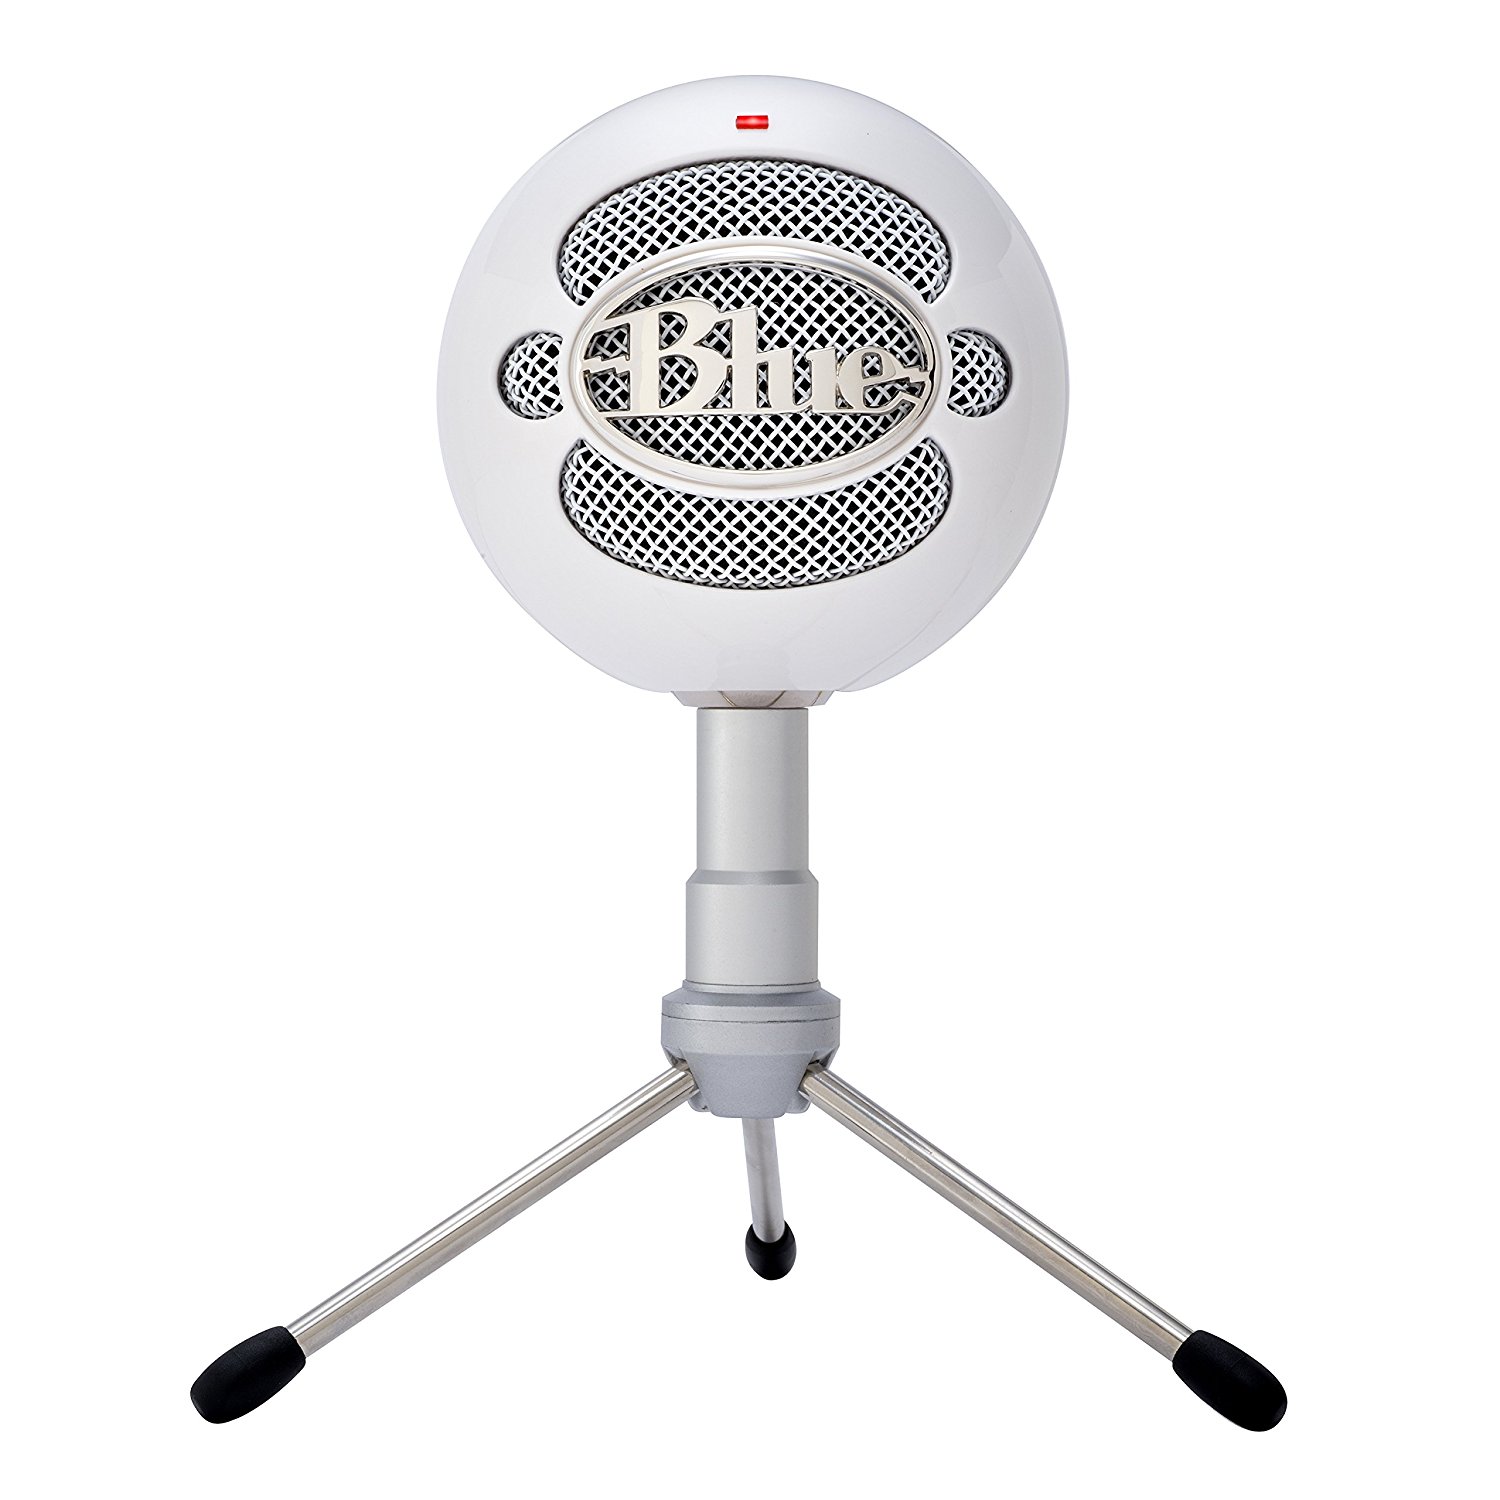
Another condenser microphone made by Blue, the Snowball iCE is a much more affordable microphone than its cousin, the Yeti (only $39.99). However, it’s low price doesn’t mean low quality. You still get that crisp, clear sound by simply plugging it into your USB port on your Mac or PC. And this microphone is one that looks great on camera (in case you want to bring it into your webinar shot).
Samson Meteor
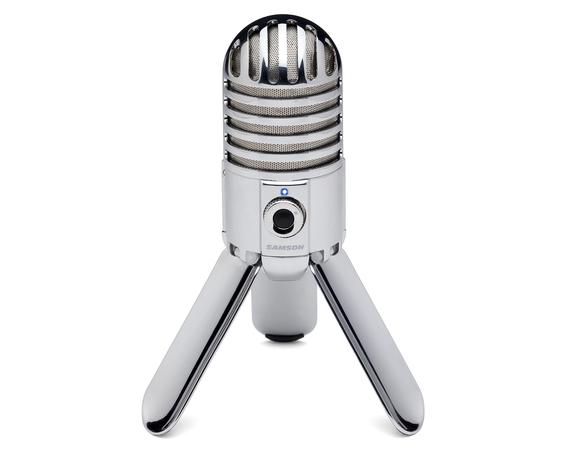
Breaking away from Blue, our next microphone — another condenser — is made by Samson technologies. The Samson Meteor is a USB studio microphone that is powerful, affordable ($63.50 online) and stylish. The main microphone is a throwback to retro eras, while the base folds up, making it a snap to use on the go. Like the Blue Yeti, the Meteor has a built-in headphone jack and muting capabilities. However, unlike the previous two, the Meteor can plug right into your iPad so you can edit your audio on GarageBand before popping it into your automated webinar.
Rode Procaster
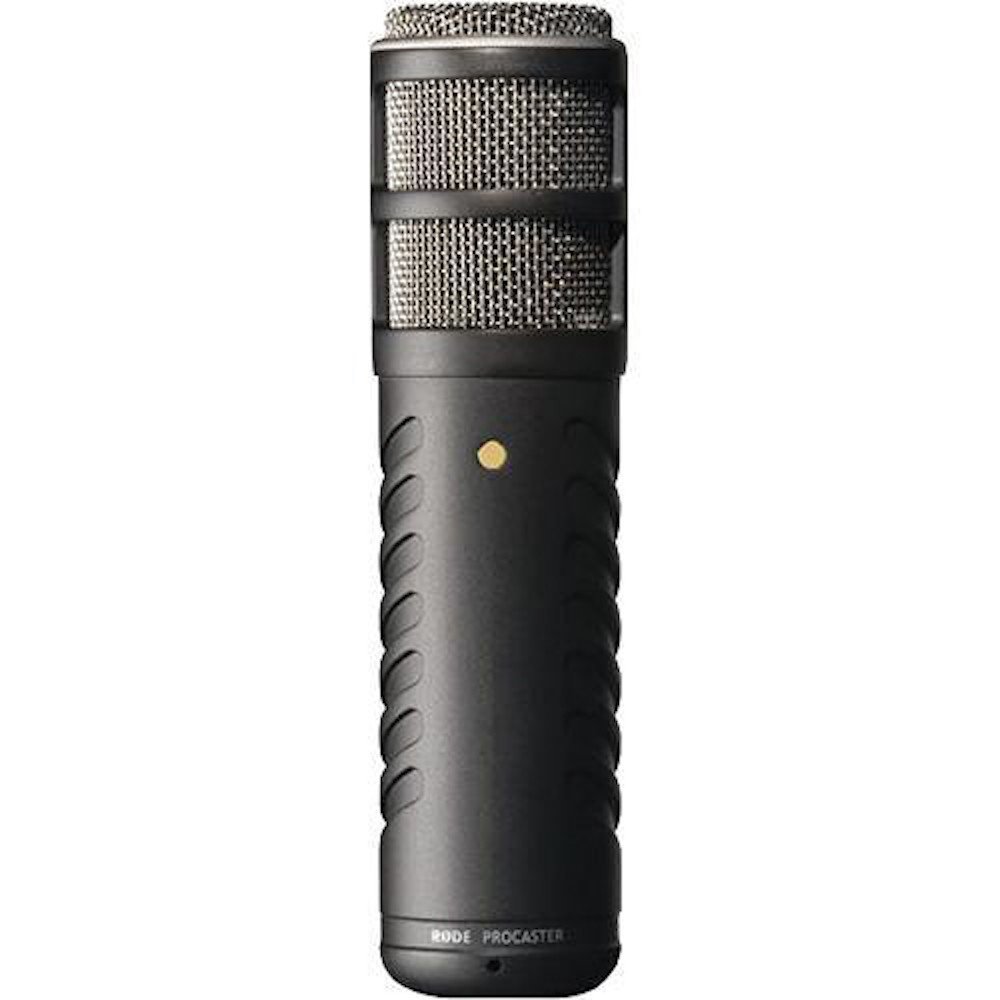
Rode microphones are well known for their quality (and their rather high price tag — this one rings in at $229). Unlike the microphones mentioned earlier on this list, the Procaster is dynamic, meaning you will get a warmer sound with less ambient noise. The Procaster is designed for capturing high-quality audio for broadcast radio, podcasts, voice-overs and you guessed it… webinars.
One thing to note: unlike many of these other mics, you cannot simply plug the Rode Procaster in with a USB. Instead, it requires an XLR cable. If you’d prefer a USB mic, you can get the Rode Podcaster for the same price (although the audio quality is slightly poorer than the Procaster).
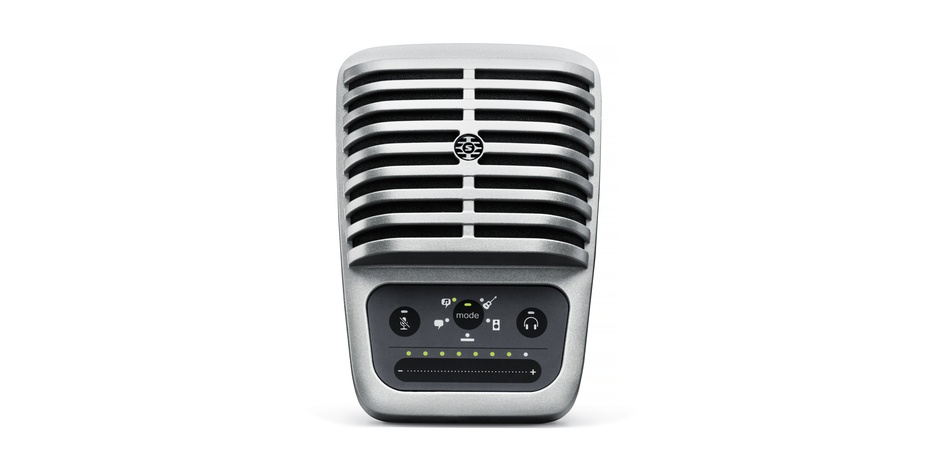
Last, but not least on our list of webinar microphones is one that was recommended to us by one of our very own customers: the Shure MV51 Condenser Microphone ($199 online). While it works on both PC and Mac, the Shure MV51 is a great choice if you have a lot of Apple products as it’s Apple MFi (Made for iPhone/iPod/iPad).
The retro style will bring you back to the 1950s, while the 5 Preset modes (Speech, Singing, Flat, Acoustic Instrument, Loud), built-in headphone jack and touch control panel will remind you that you are most definitely in the present.
Headsets:

If your webinars regularly feature other panelists or you’re a fan of promoting your attendees to your virtual stage, you may want to invest in a headset to minimize feedback audio. While a simple pair of headphones will often do (most of the mics listed above have headphone jacks), some presenters simply prefer to have a headset where you can both listen and record, without the need for an extra microphone.
Read on to discover our three favorite headsets to use when running your webinar.
Sennheiser SC 60 USB CTRL
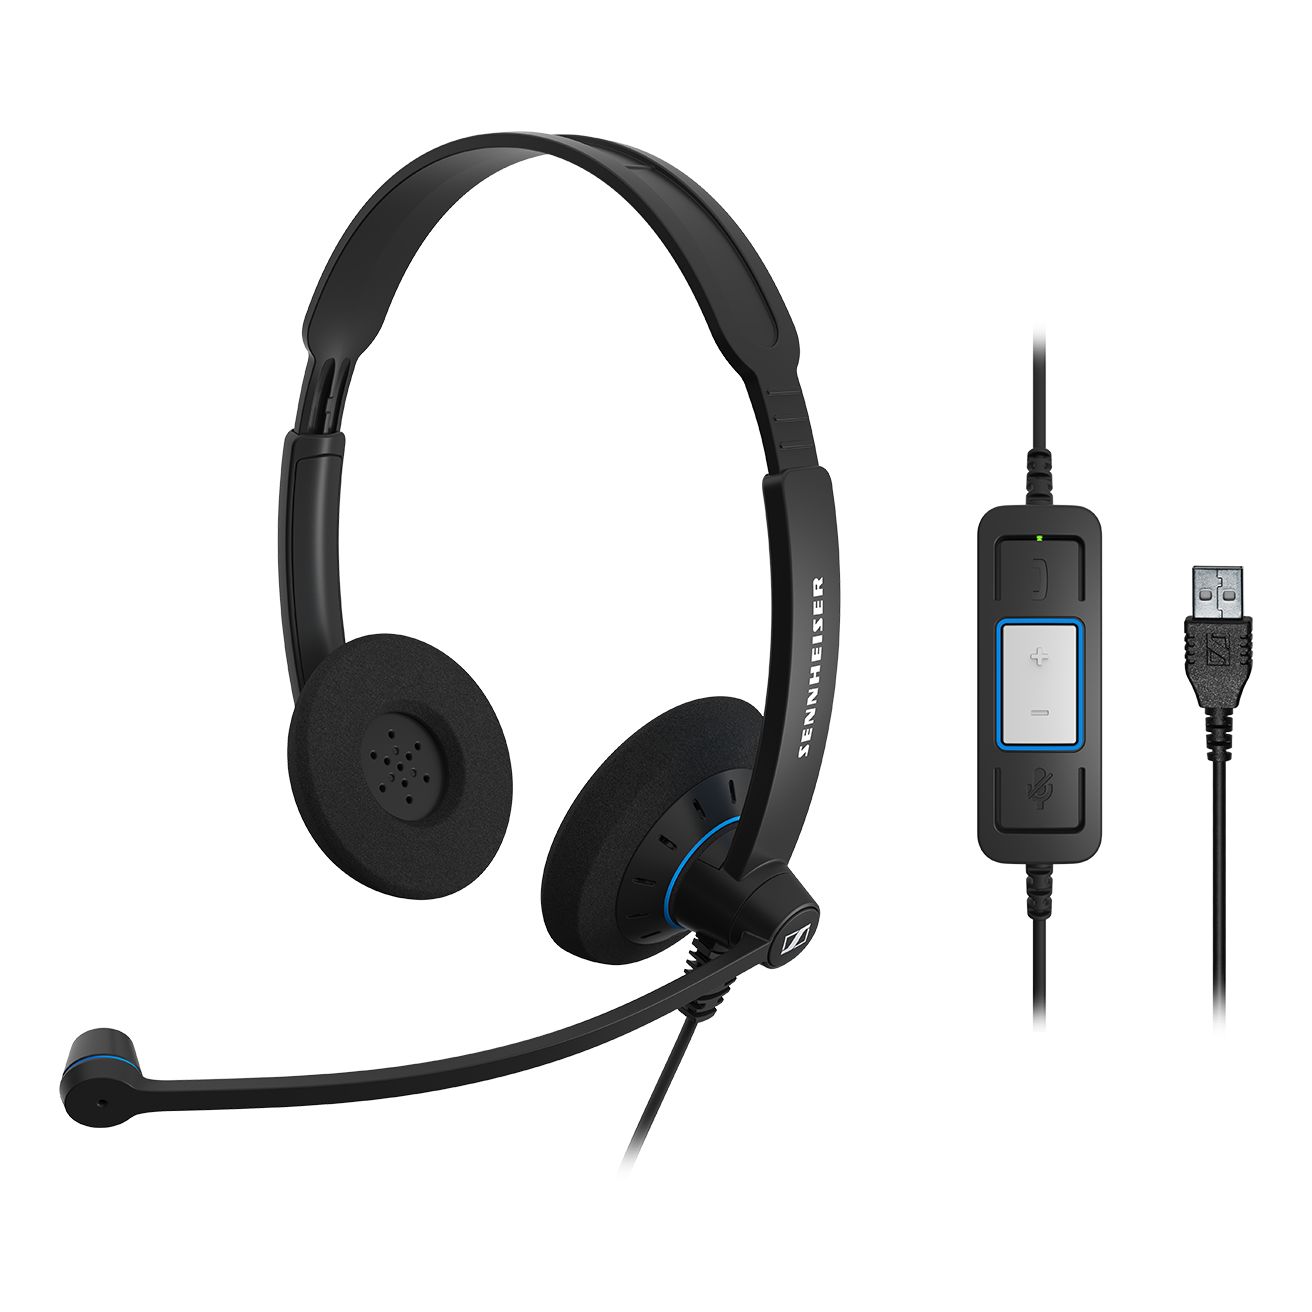
The Sennheiser SC 60 USB CTRL ($49) is a headset that’s made for those that want to block out their surroundings. The headset plugs in via USB and has two large earpads that bring sound to both ears. As far as the audio, it uses wideband sound and a noise-canceling microphone to filter out ambient noise so your attendees hear you, and only you.
Mpow V4.1 Bluetooth Headset
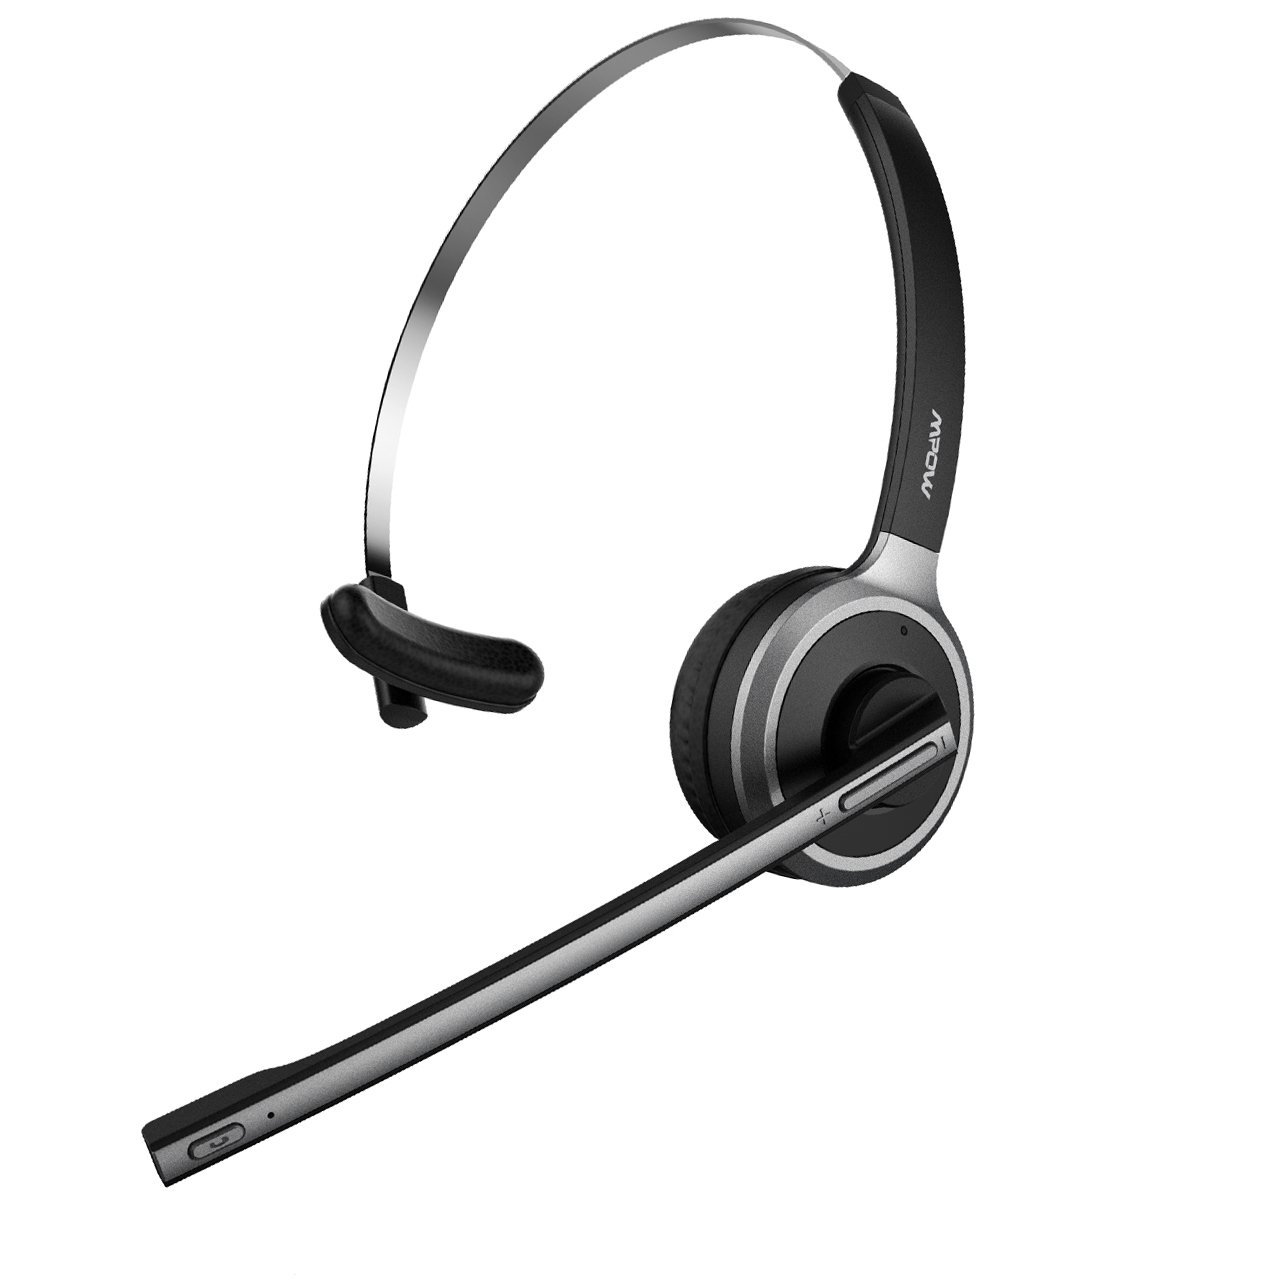
Don’t let the low price fool you (only $21.99) – this headset is optimized for your voice to be heard and for you to hear any voices on the other end (if there are any). The Mpow V4.1 has a 4X noise-cancelling microphone to block out unwanted noise so you come in crystal-clear to your attendees. Unlike the Sennheiser, this headset only has one earbud so that you can hear your surroundings as well as your audio. It also uses Bluetooth, not USB, to connect to your computer. This is great if you like to move around while you present, but Bluetooth also means you’ll need to remember to charge it before you go live.
Logitech H800 Bluetooth Headset
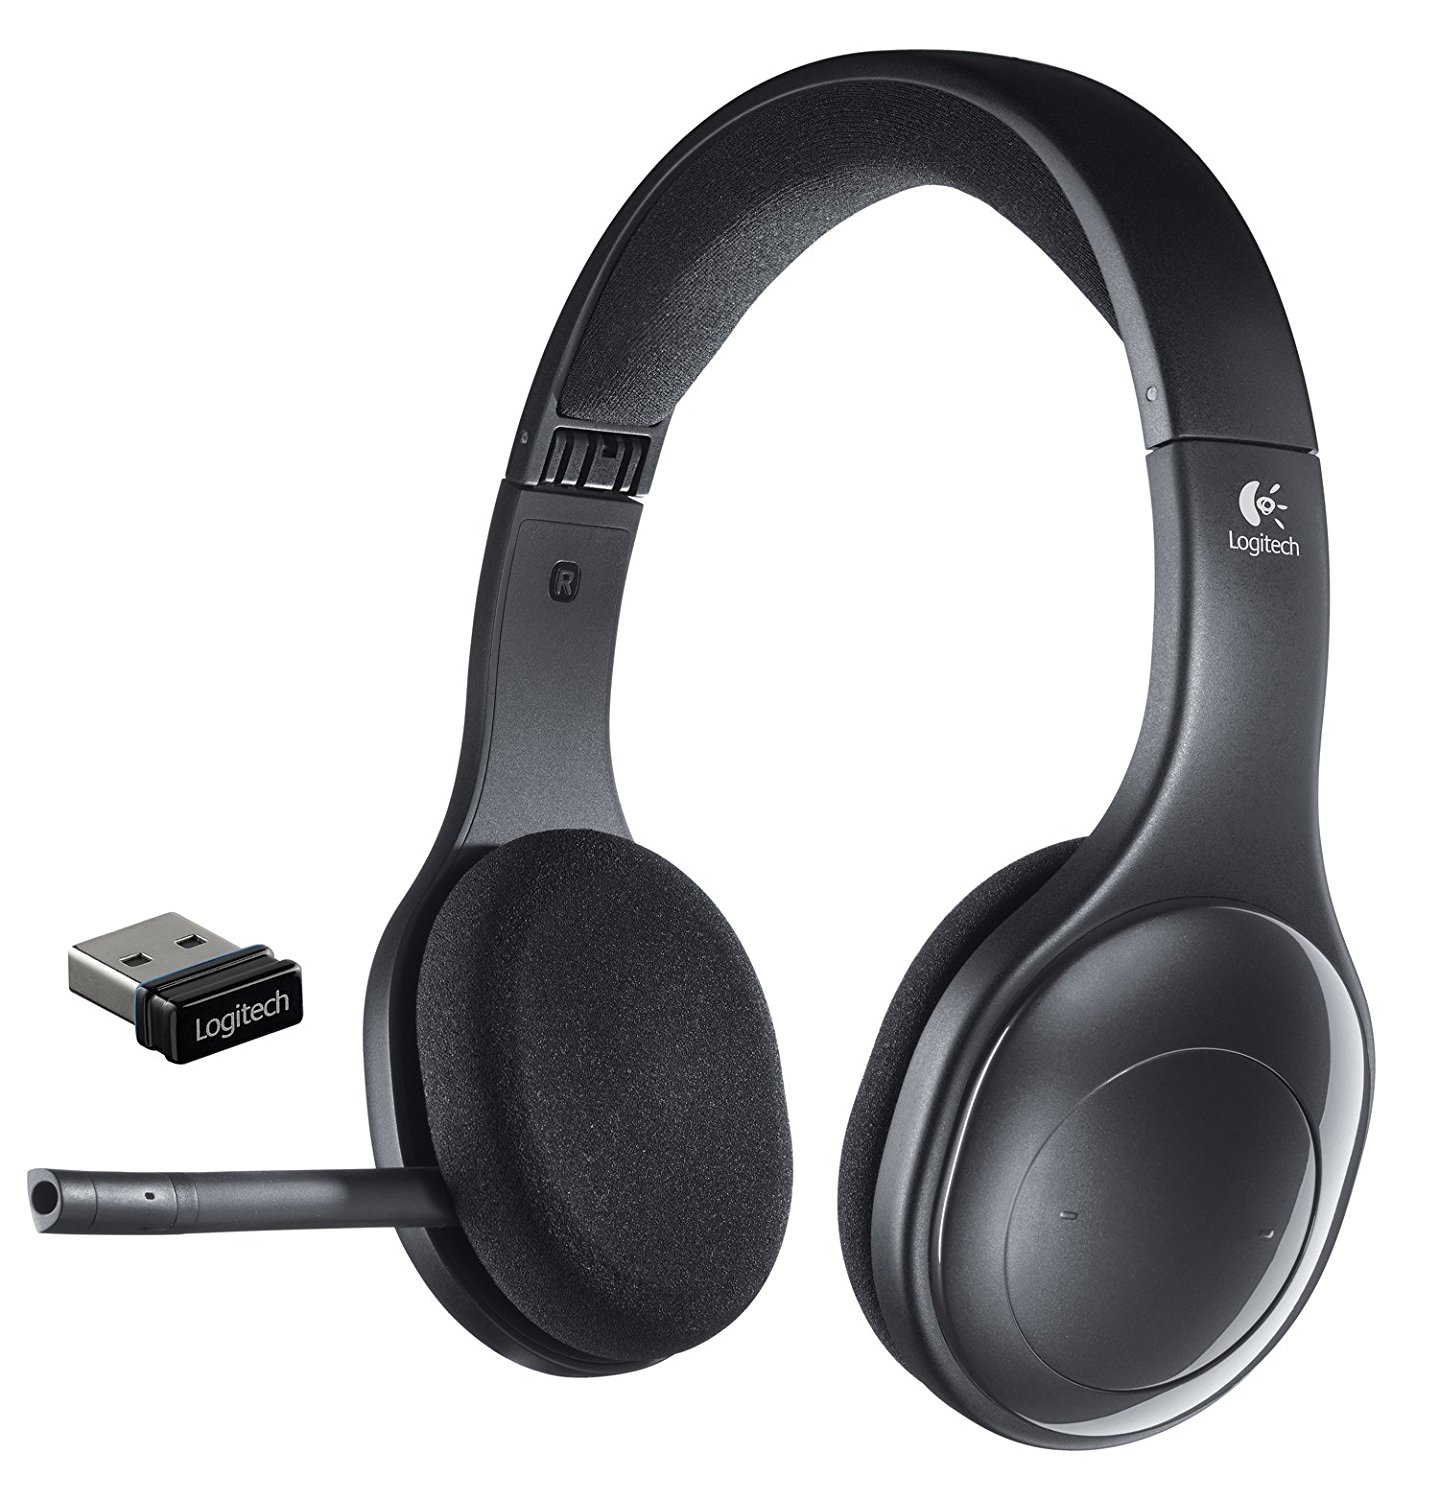
Logitech doesn’t just make great webcams; their headsets are pretty fantastic too. The Logitech H800 ($63.99) is a Bluetooth headset that is optimized for PC, tablets and smartphones (sorry Mac users, this one isn’t for you). Like The Sennheiser, the H800 has earpads on both sides, so you’re surrounded by sound. It uses a noise-canceling boom microphone so your audio will come out clear to your attendees. If you’re a traveler, these fold up nicely, making them easy to pack. And while you can use it wirelessly as a Bluetooth headset, if you forget to charge your headset before you go live, it’s no big deal. Simply plug in the USB charger and use it instantly (even if there’s not a single iota of power left). Pretty awesome, right?
So Which Tools Are Right For You?
At the end of the day, whichever webcam and microphone/headset you choose will depend on your budget and where/how you host your webinars. Whether you prefer a Logitech, a Blue, a Samson or a Rode, your webinars will go up a notch (or ten), just by using quality equipment. Sure, the most expensive mic might have a slight edge on the bargain one, but that bargain mic is still worlds better than the built-in mic on your webcam or computer.
Your attendees will see you and what you’re presenting clearer. They will actually hear what you’re saying. And your webinar conversions will increase as a result.
Just remember, if you want to use an external microphone or webcam, make sure to set it as the default in your browser or WebinarJam may pick up your built-in video and audio…and you’ll have just shelled out your cash for nothing. Safari users will need to use Chrome or Firefox to change cameras or microphones as Safari uses the default camera and microphone.
